Requirements
Before we begin, we need to have a Webflow account. In the begining, you can take Webflow's free plan and afterwards choose an improved one. Each plan unlocks different features.
Step 1 - Create the proper environment
As we said, Webflow is the tool or platform that will help us creating our blog in a fast and easy way. After registering your account, follow these steps:
- Choose, in between the options given, which blog template you like the most and click on it.
- Create the structure and apply the styles.
⚠️ Design only your first blog post. We will create the following posts with CMS component ⚠️
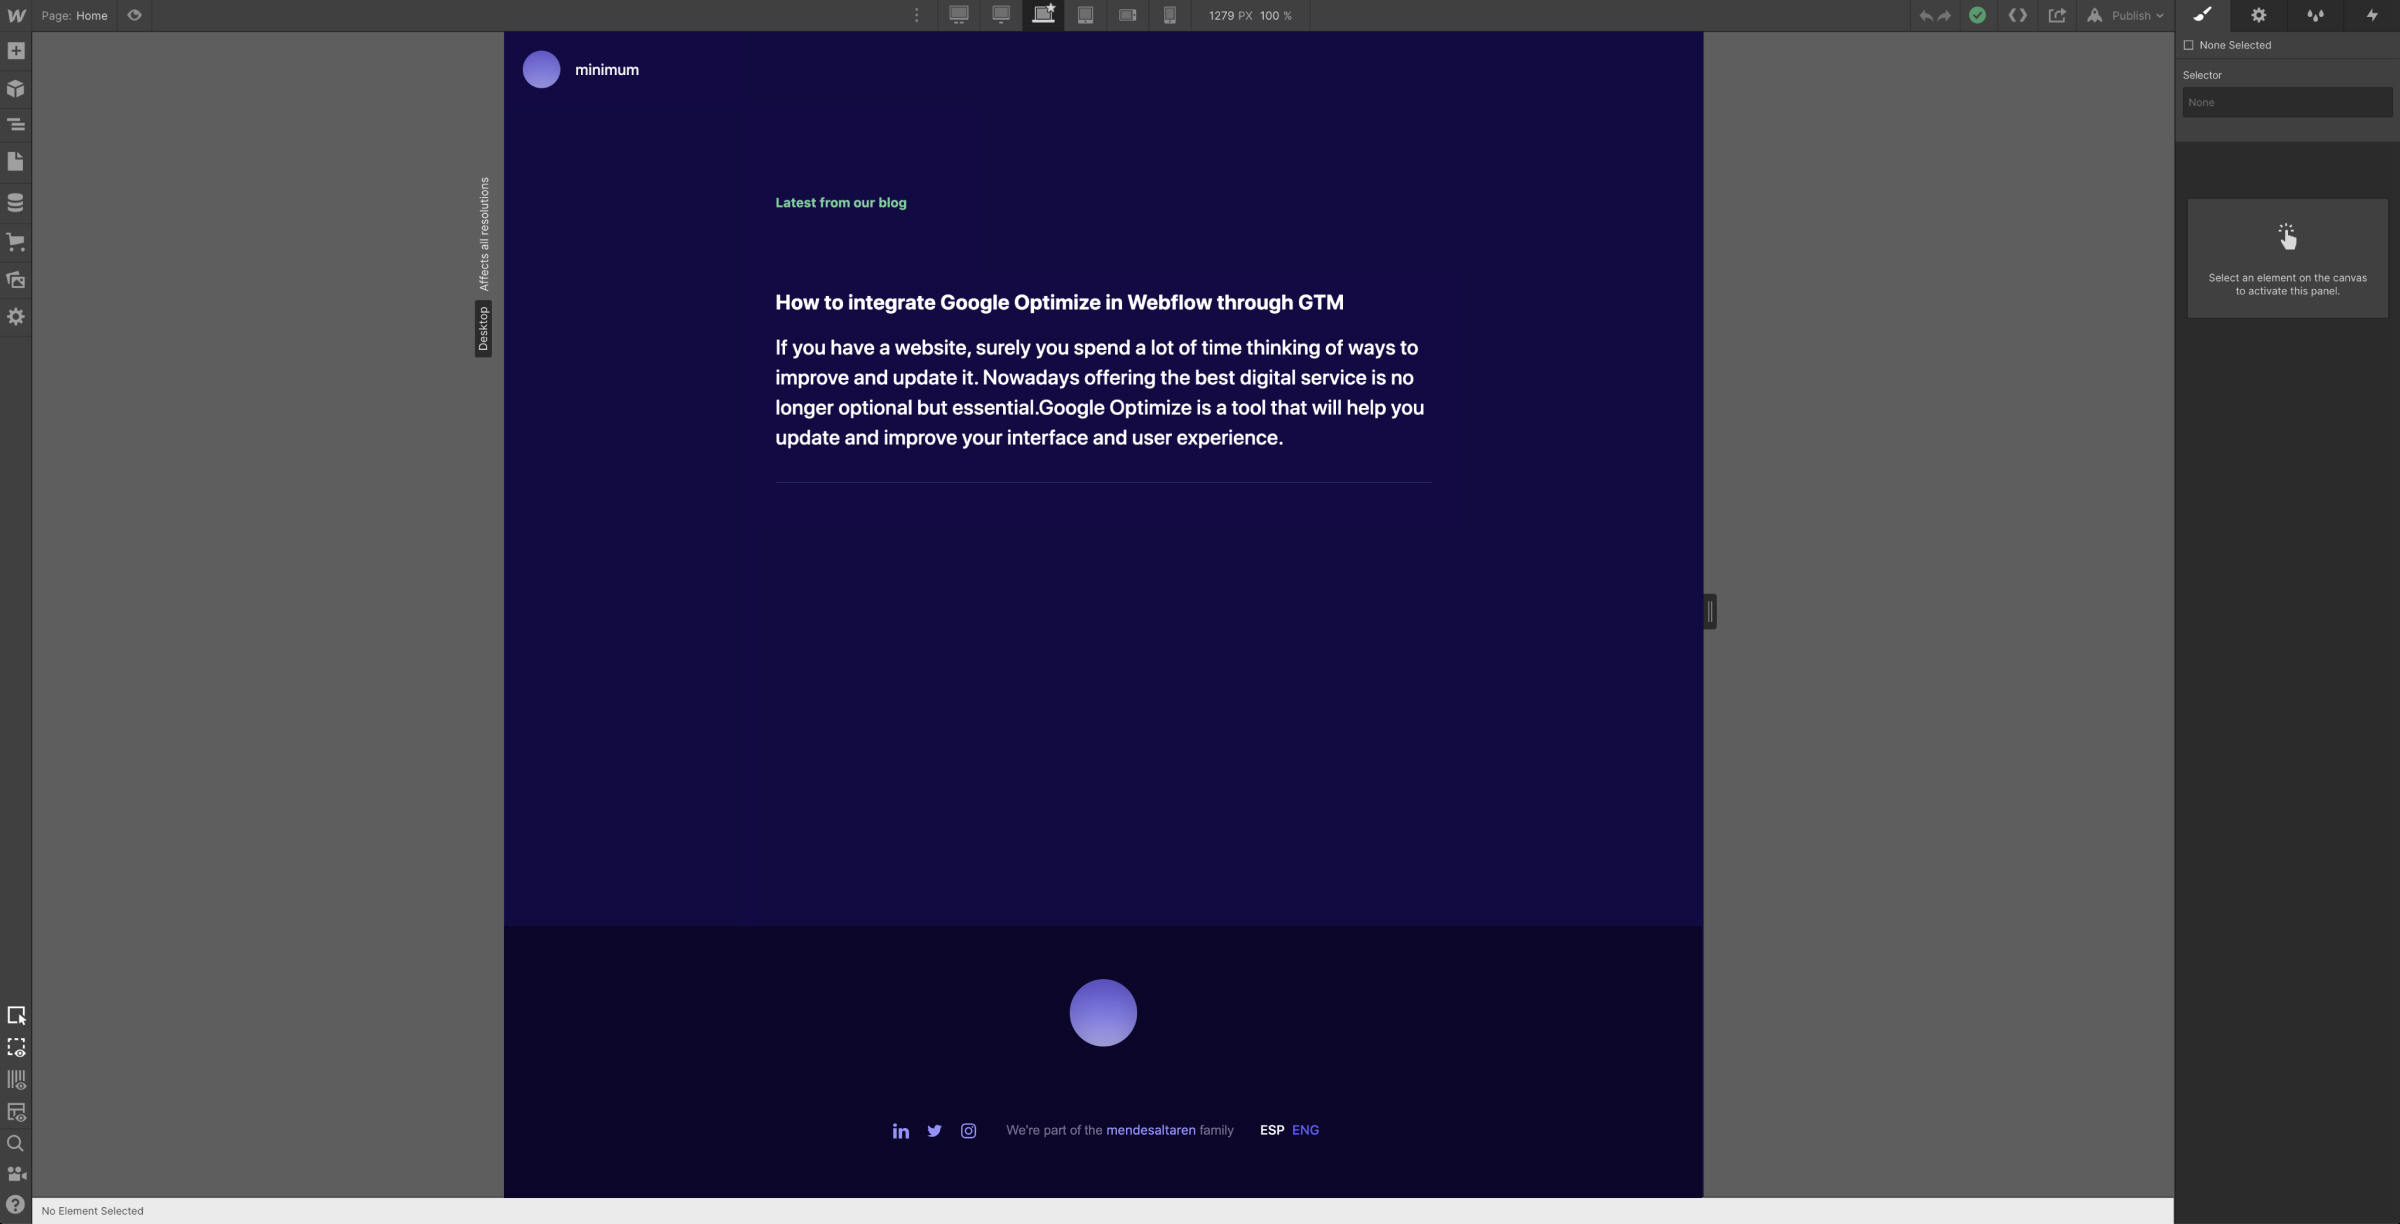
Now we have our blog structure designed and we are ready to add the CMS component which will fasten our work.
Step 02 - Create a CMS Collection
In the right hand menu we would be able to find the different features Webflow has. One of those features is the "CMS collections" button. If we click on it, we will be able to create a new collection.
- Name the collection ("Collection Name")
- Name the different post fields ("Collection Fields")
Now we will basically have:
- Section Name under Basic info . Eg. Post Title.
- The other post elements under Fields such as the blog description (Plain text), a link to the blog and a rich text that will hold all the post content.
It should look like this:
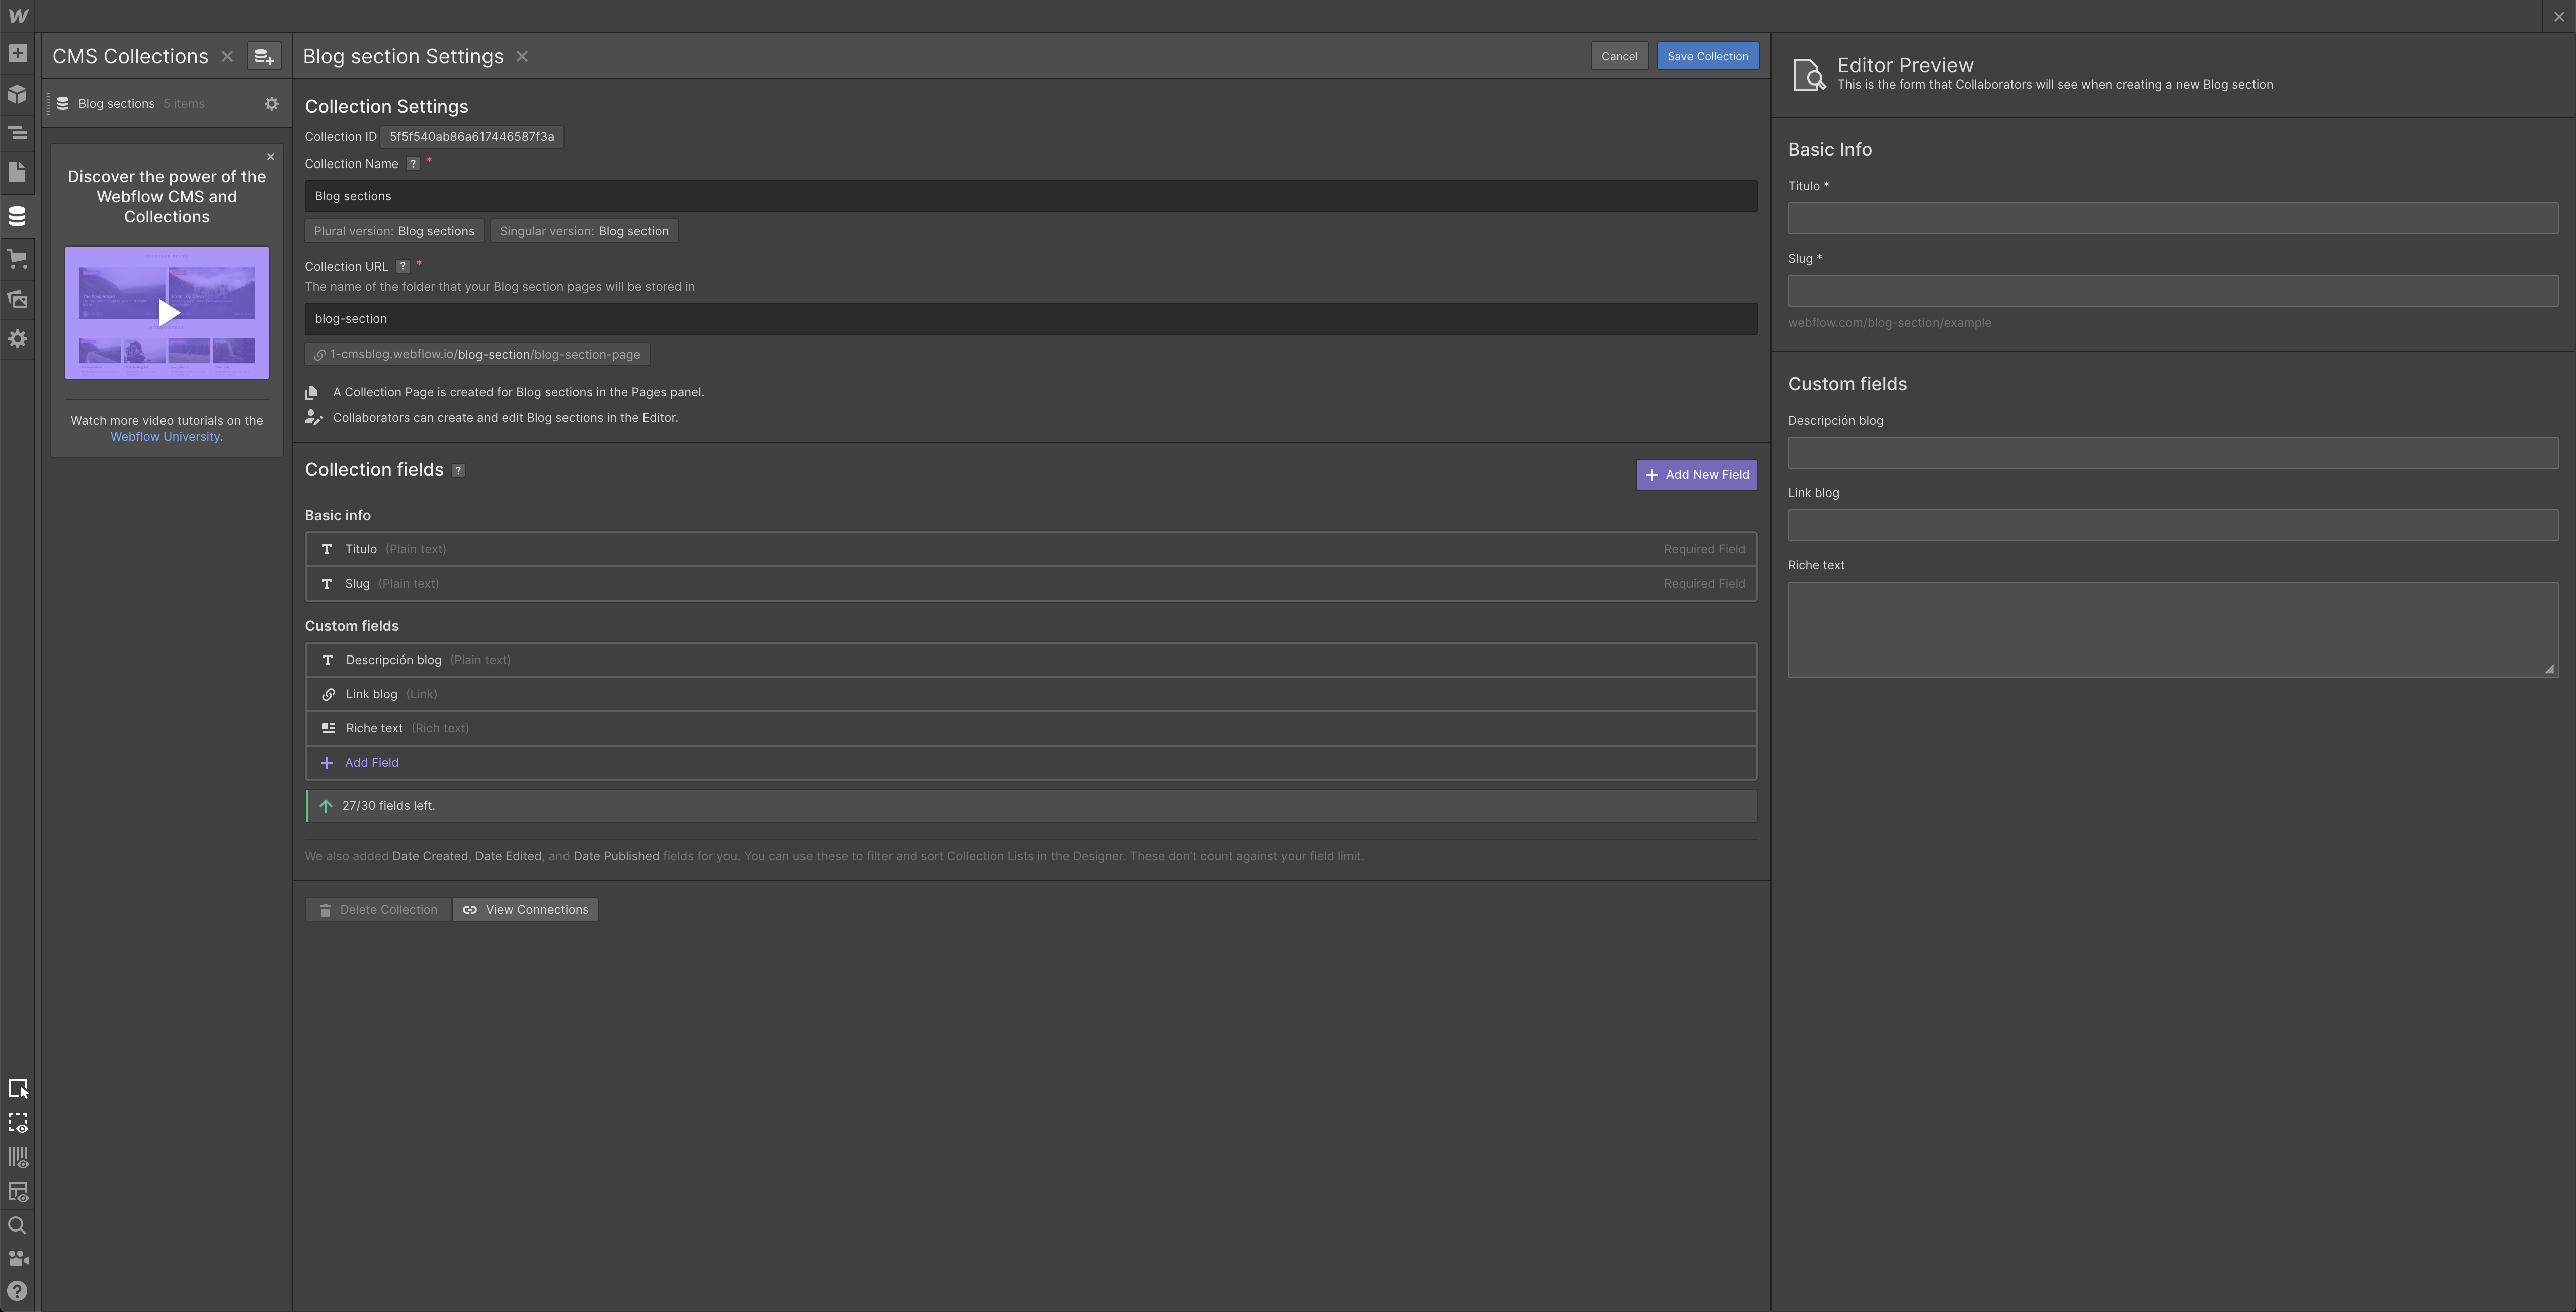
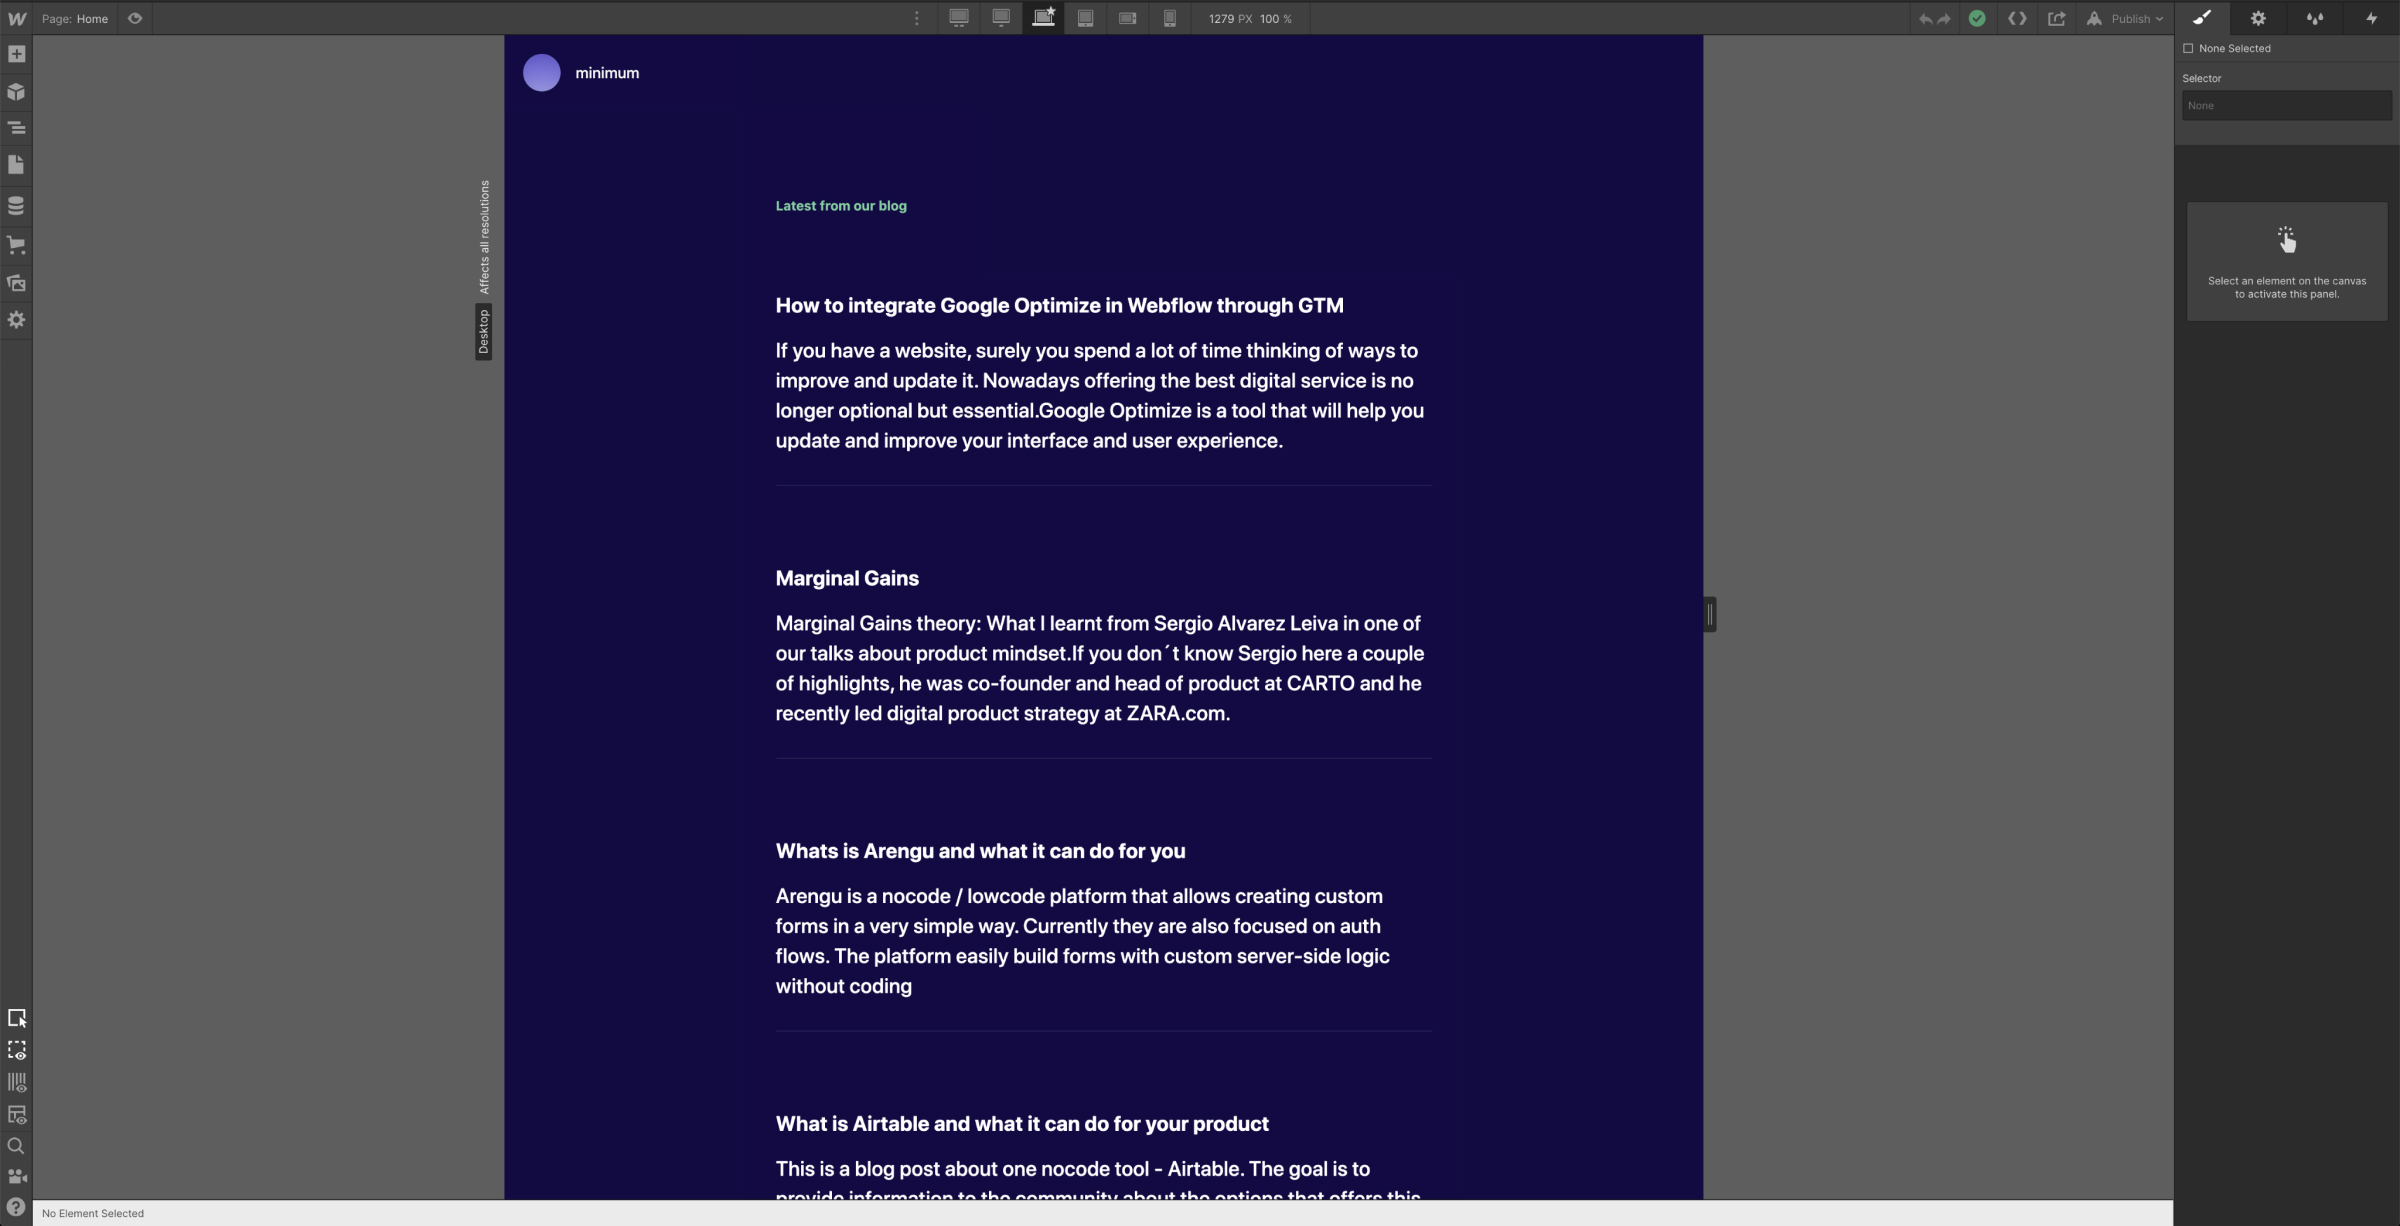
Once clicked on "Create Collection" we will be able to choose how many elements our collection will have. Click on Add 5 items. After implementing these settings, the following five posts will be created automatically and we will only need to add the personalized features in the different fields we already created -title, description,...- The Rich text component will help us to create easier and faster blog content.
Step 03 - Connect CMS component to post elements
If we look the menu, we will find, under "Add components" the CMS component. You will see the options this component has. We would want to add our Collection list to the structure and connect it to the already created collection.
How to connect it?
- Insert the CMS component in the general container that keeps the different posts.
- Click on the settings icon from the component and select the already created collection.
- Insert the posts elements container in the field Collection Item
- Connect each post element with the already created collection fields. You will be able to connect these elements through the settings icon by selecting "Get text from name of the collection"
After following these steps we should have all the posts with the connected elements.
Step 04 - Create the post template
As we can see, by adding and connecting CMS component with the post elements, a page or blank template will automatically be created.
In this blank template we would create each of the new posts structures.
We will replicate the basic structure of the blog with features such as navbar or footer. In the post body we will add the rich text component. Just as we did before with the others, now we need to add the CMS component to the rich text container to connect both of them. We will now automatically have the structured posts with their titles, images and so on.
💡To check whether all posts have been properly filled or not we can change
the different pages through the preview button in the upper left side of the page.
If you followed these steps you should have your blog and all its posts ready 👏🏻
Here you can see our blog reply and in the Webflow's Showcase you can find a cloneable project.
Thank you!
Let’s grow together
Reach a new level of growth