We know that the study of metrics is something vital in the life of any project. Monitoring the data helps us to design improvement strategies and position ourselves based on hypotheses that, thanks to these numbers , show us objectively what the trends are.
In order to visualize the data collected from our project or website we have different tools available. In addition to the range of tools, the data can be read in different ways: in tables, with simple metrics, percentages, in bar or line charts, in portion charts...
Another way of visualizing data that is very useful when hypothesizing is by maps: scroll maps, heat maps, click maps. These maps are really practical as they allow us to know exactly which contents, forms or designs attract our users' attention the most. Apart from the maps, we can also directly observe recordings of the sessions on our page.
Hotjar is the NoCode tool that allows us to visualise the data in these two ways and therefore we consider it to be a basic tool for measurement. In this post we will learn step by step how to configure it to collect the data of our Webflow project through Google Tag Manager.
Requirements
Before you begin, you must have your Google Tag Manager container and account created, as well as the Hotjar account.
- Hotjar
- Google Tag Manager
- Webflow
Step 01 - Sign up for Hotjar
To begin with, as we mentioned, you will need to create a Hotjar account in order to link to your project.
Hotjar has both free and paid plans. Unlike other tools, in Hotjar's free plans you can access both mapping and recording. However, you can only record up to 100 random session recordings and make a limited number of maps.
Choose one of the non-free plans to get unlimited session recordings and maps as well as other features not included in the free plan.
In this link you can choose Hotjar's plans: www.hotjar.com
Step 02 - Instal Hotjar in your site
In order to use Hotjar you must install it on your website. To do this, you must place Hotjar's pixel or code in the code of the page. There are several ways of doing this: you can install Hotjar's pixel or code directly in the code of the web page, you can do this through one of the integrations that Hotjar gives us and you can ask for assistance in installing it from a professional of the tool. When you enter your account, you will see the following screen showing you the following options:
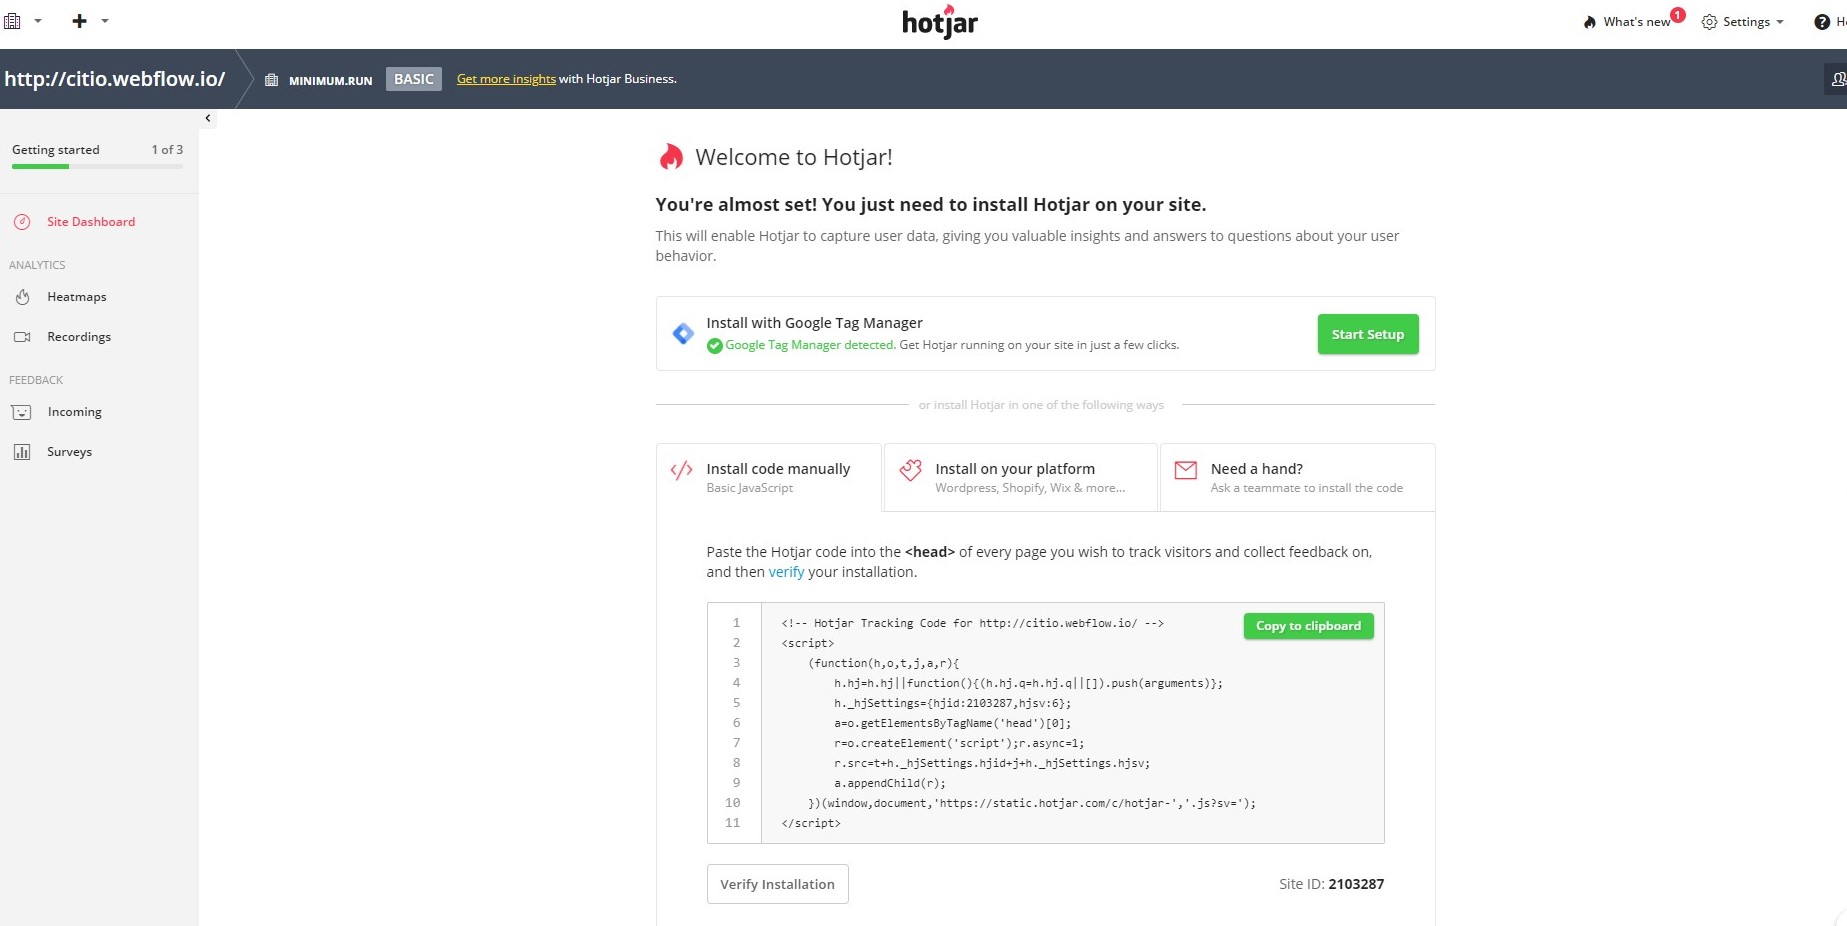
As we are going to install Hotjar through Google Tag Manager, something that will facilitate the process and allow us to centralise all the data through the Google tool, you must click on the "Start Setup" button and among the options select the account with which you have created Hotjar.
Now, you can accept all the permissions Hotjar asks for and click the "Allow" button. Accepting the permissions will authorize the tool to collect all the data that will be so useful to us.

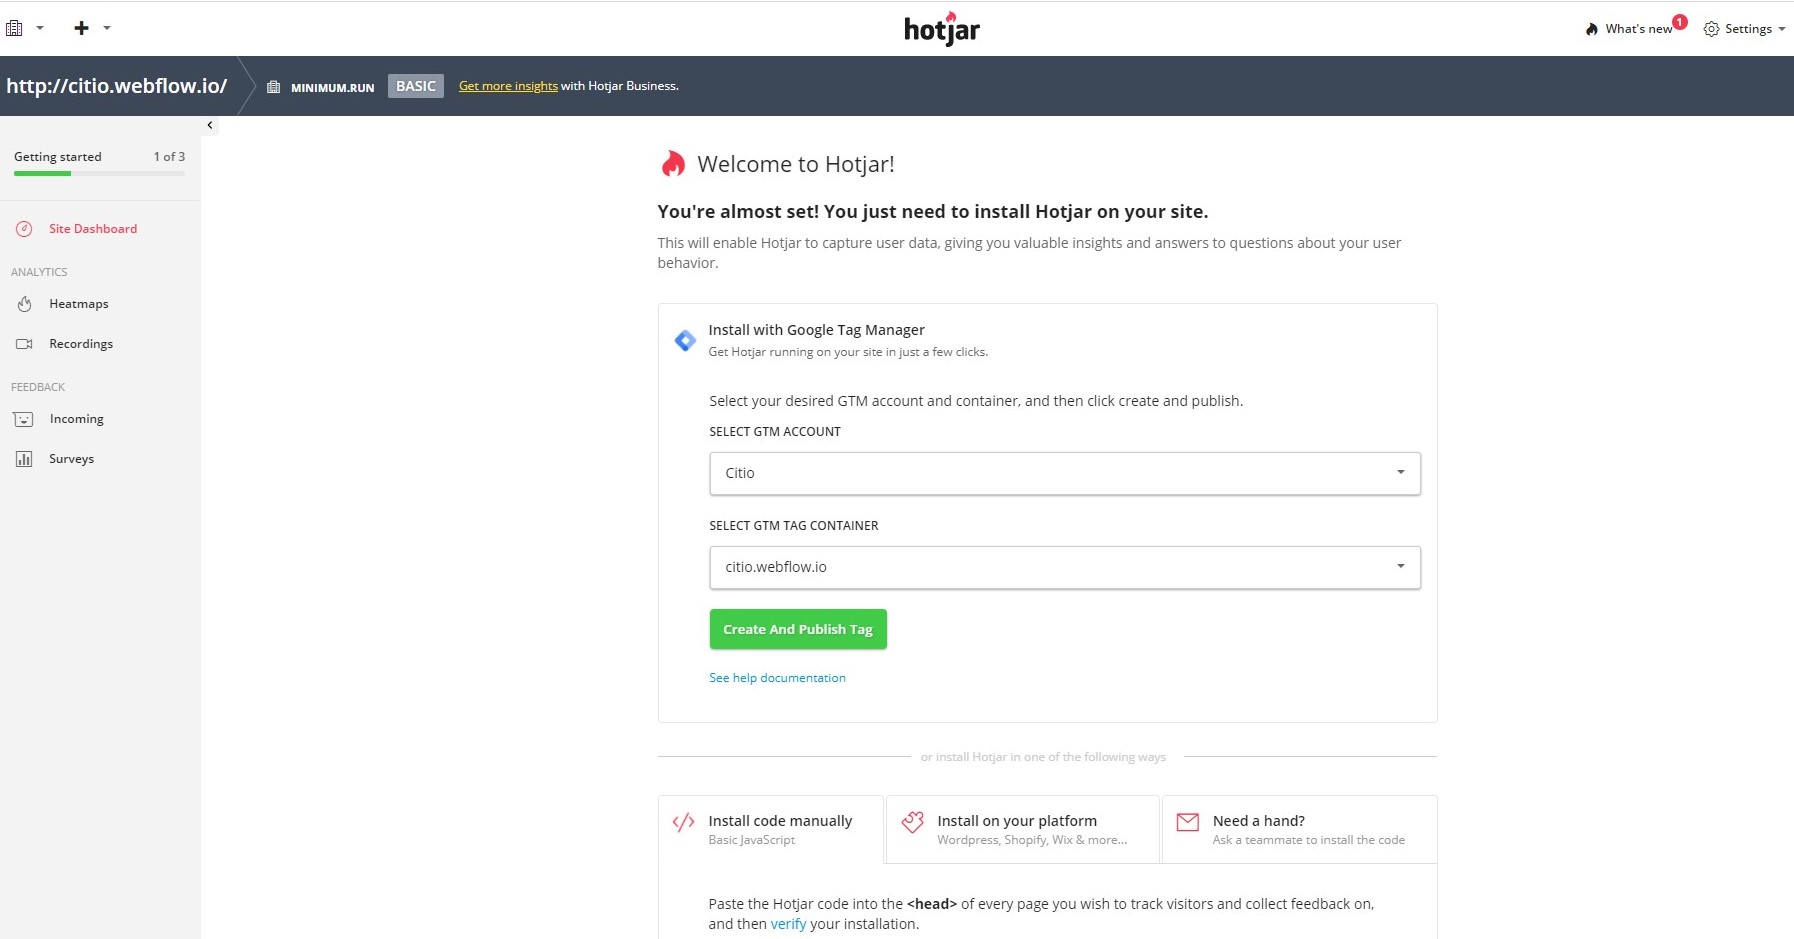
Now, in the window that will appear, choose and select your Google Tag Manager account and the container you want to link. As we mentioned at the beginning, you must have previously created said container.
Once selected, click the "Create and Publish Tag" button to have Google Tag Manager pick up Hotjar's instructions and automatically create a tag for the tool.
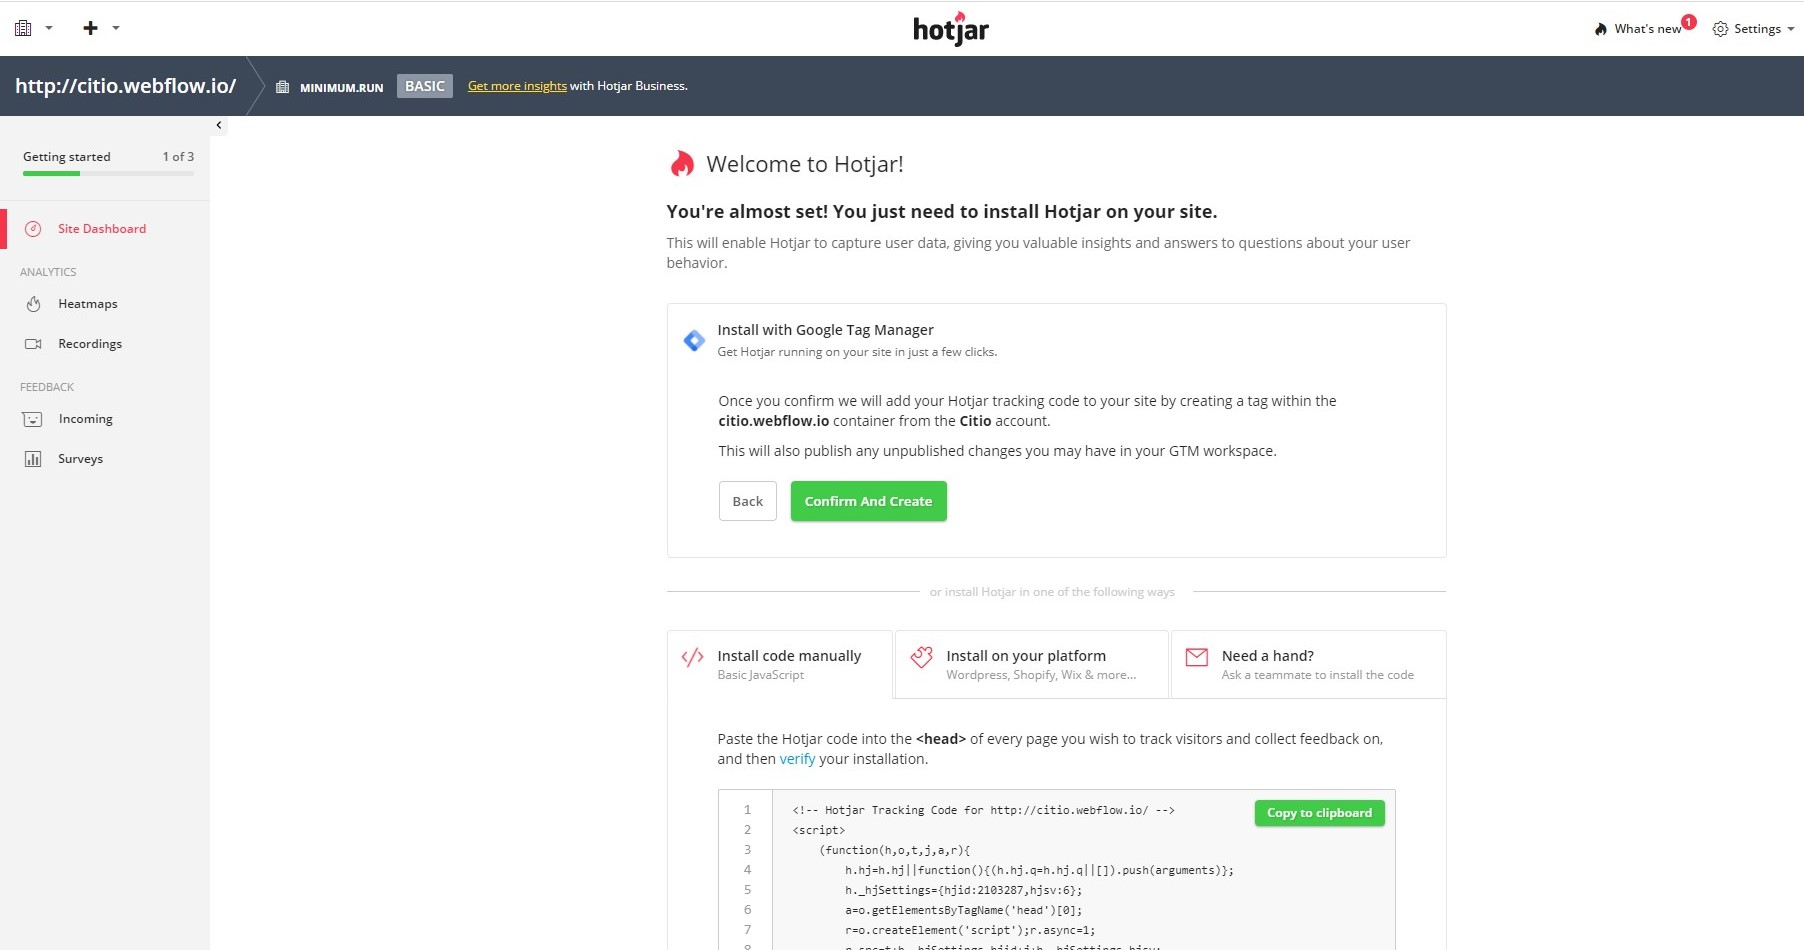
Finally, you must confirm the publication of the installation with the "Confirm and create" button.
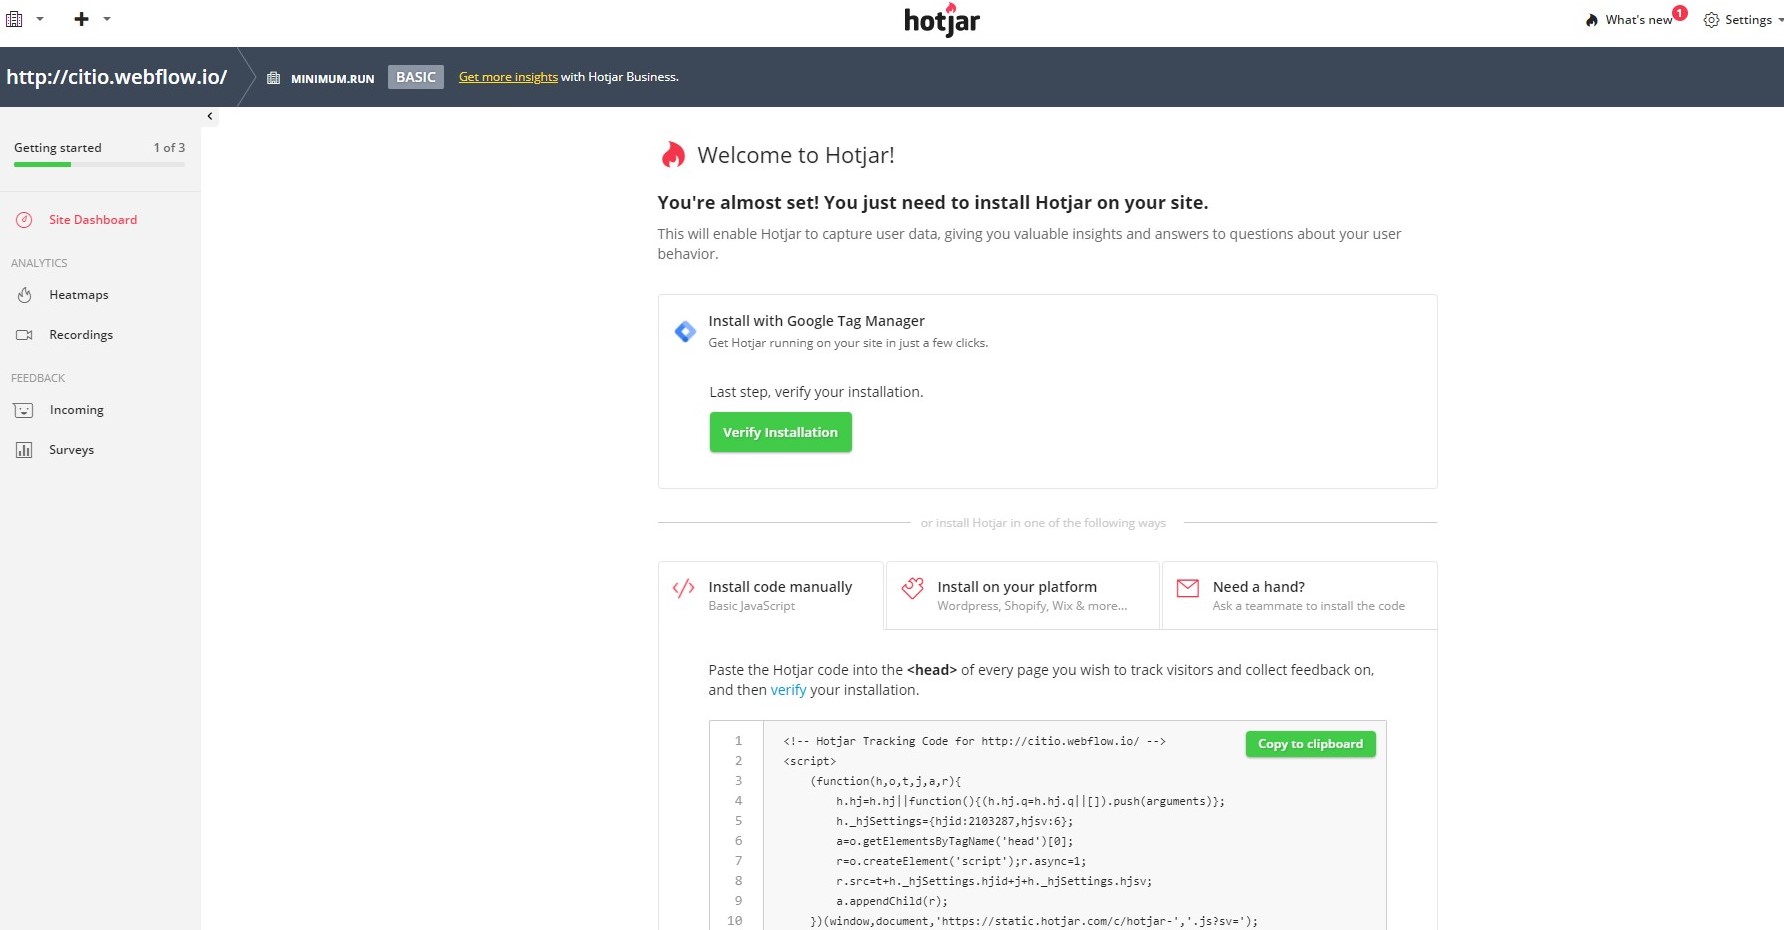
Step 03 - Verify the installation
Now that we have created the link between Hotjar and Google Tag Manager by placing Hotjar's code in a Google Tag Manager tag, the measurement tool will want to verify that the link is indeed working and the data is being collected. On the next screen you will be asked to perform this check, click the button to verify the installation:
To verify the installation correctly, in the pop-up window you must enter the URL of your site or web page and click again on the button to verify the installation.
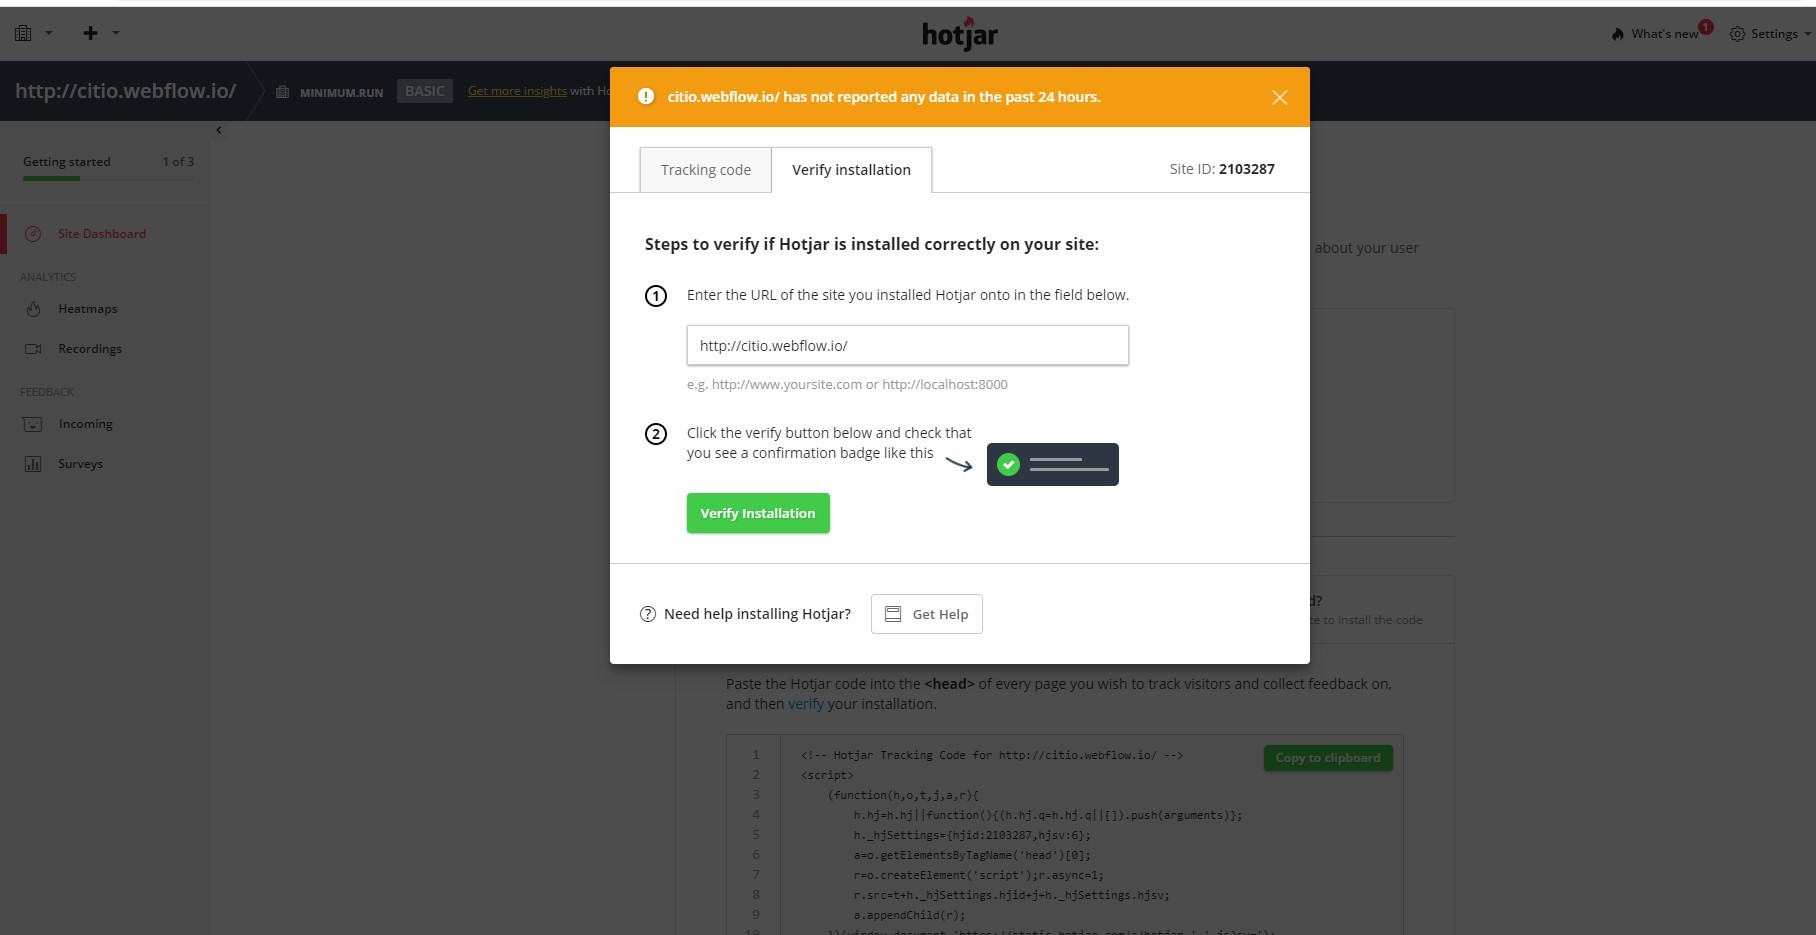
You should get the verification tab and a new pop-up window with the confirmation, this way:
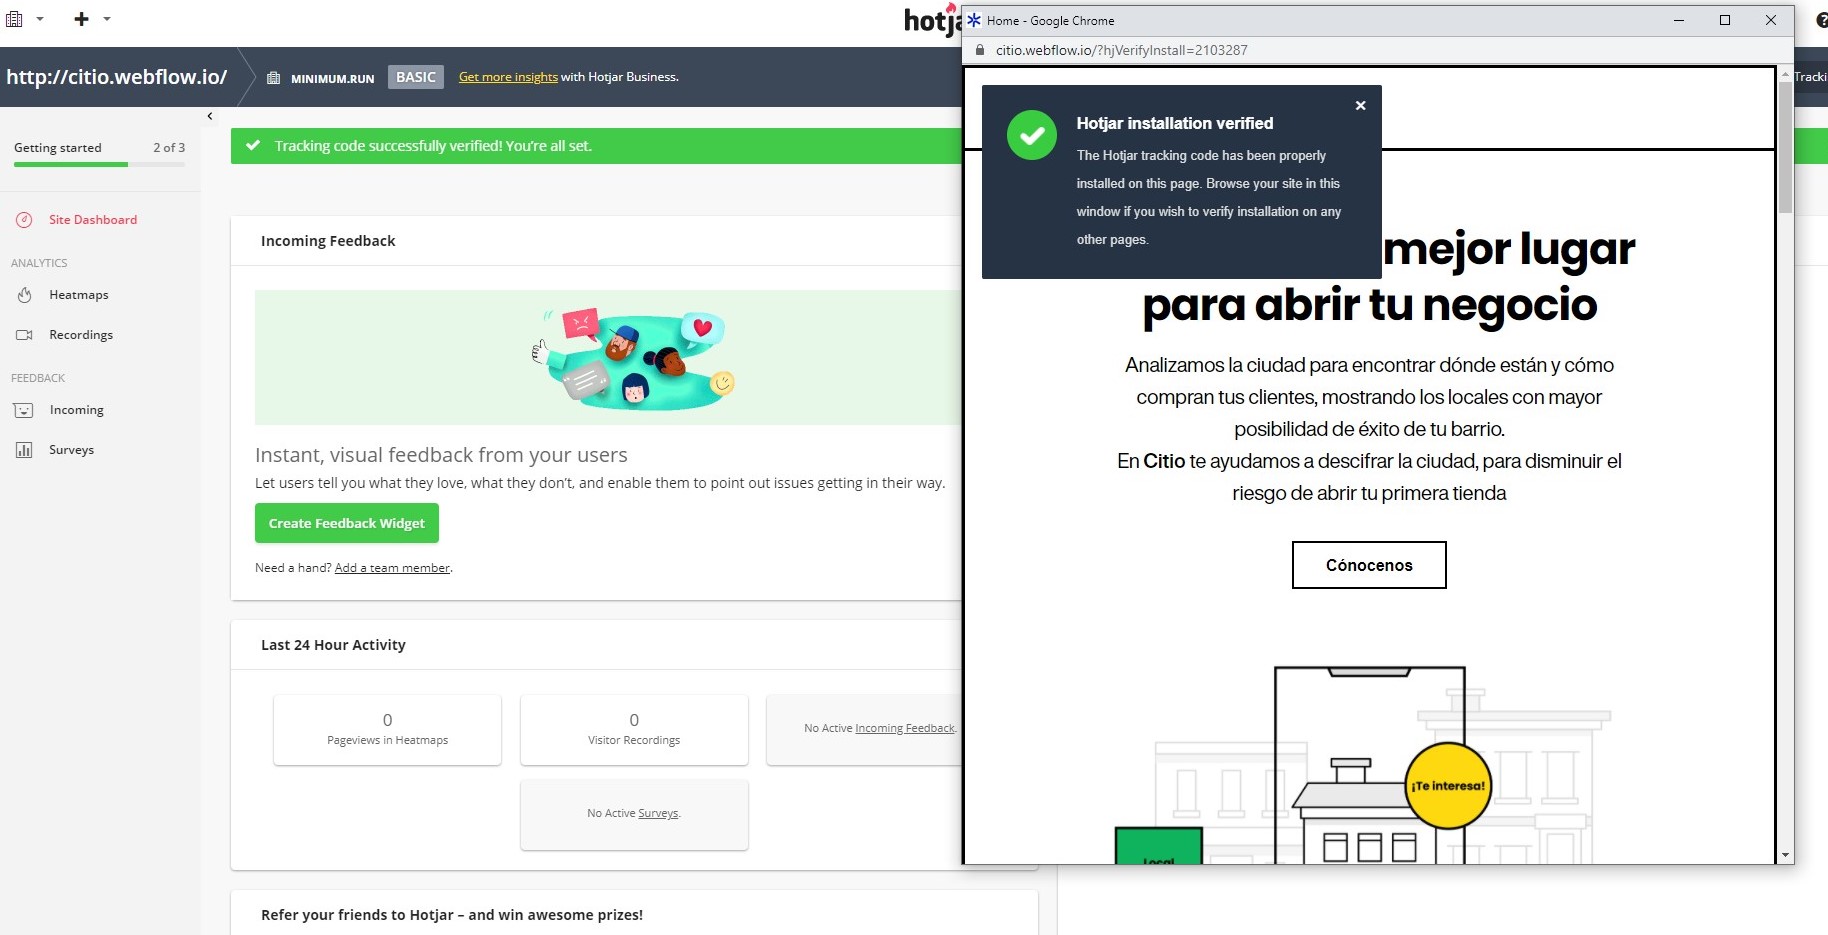
Good! We now have Hotjar's configuration completed with Google Tag Manager!
Thank you!
Let’s grow together
Reach a new level of growth