In this tutorial we are going to create an automated integration to post references links on Twitter when they are posted on a Slack channel. This guide is written step by step, so it is ideal for those who want to do their first integration.
Requirements
Before we begin, it is necessary to have an account in the following services. They all have a free tier which we can work with.
Step 01 – Creating our scenario
Integromat will be our automation platform. The one who will do the heavy lifting for us. When you have your account created and you are already logged in, follow these steps:
- Go to your Dashboard.
- Click on the button "Create new scenario".
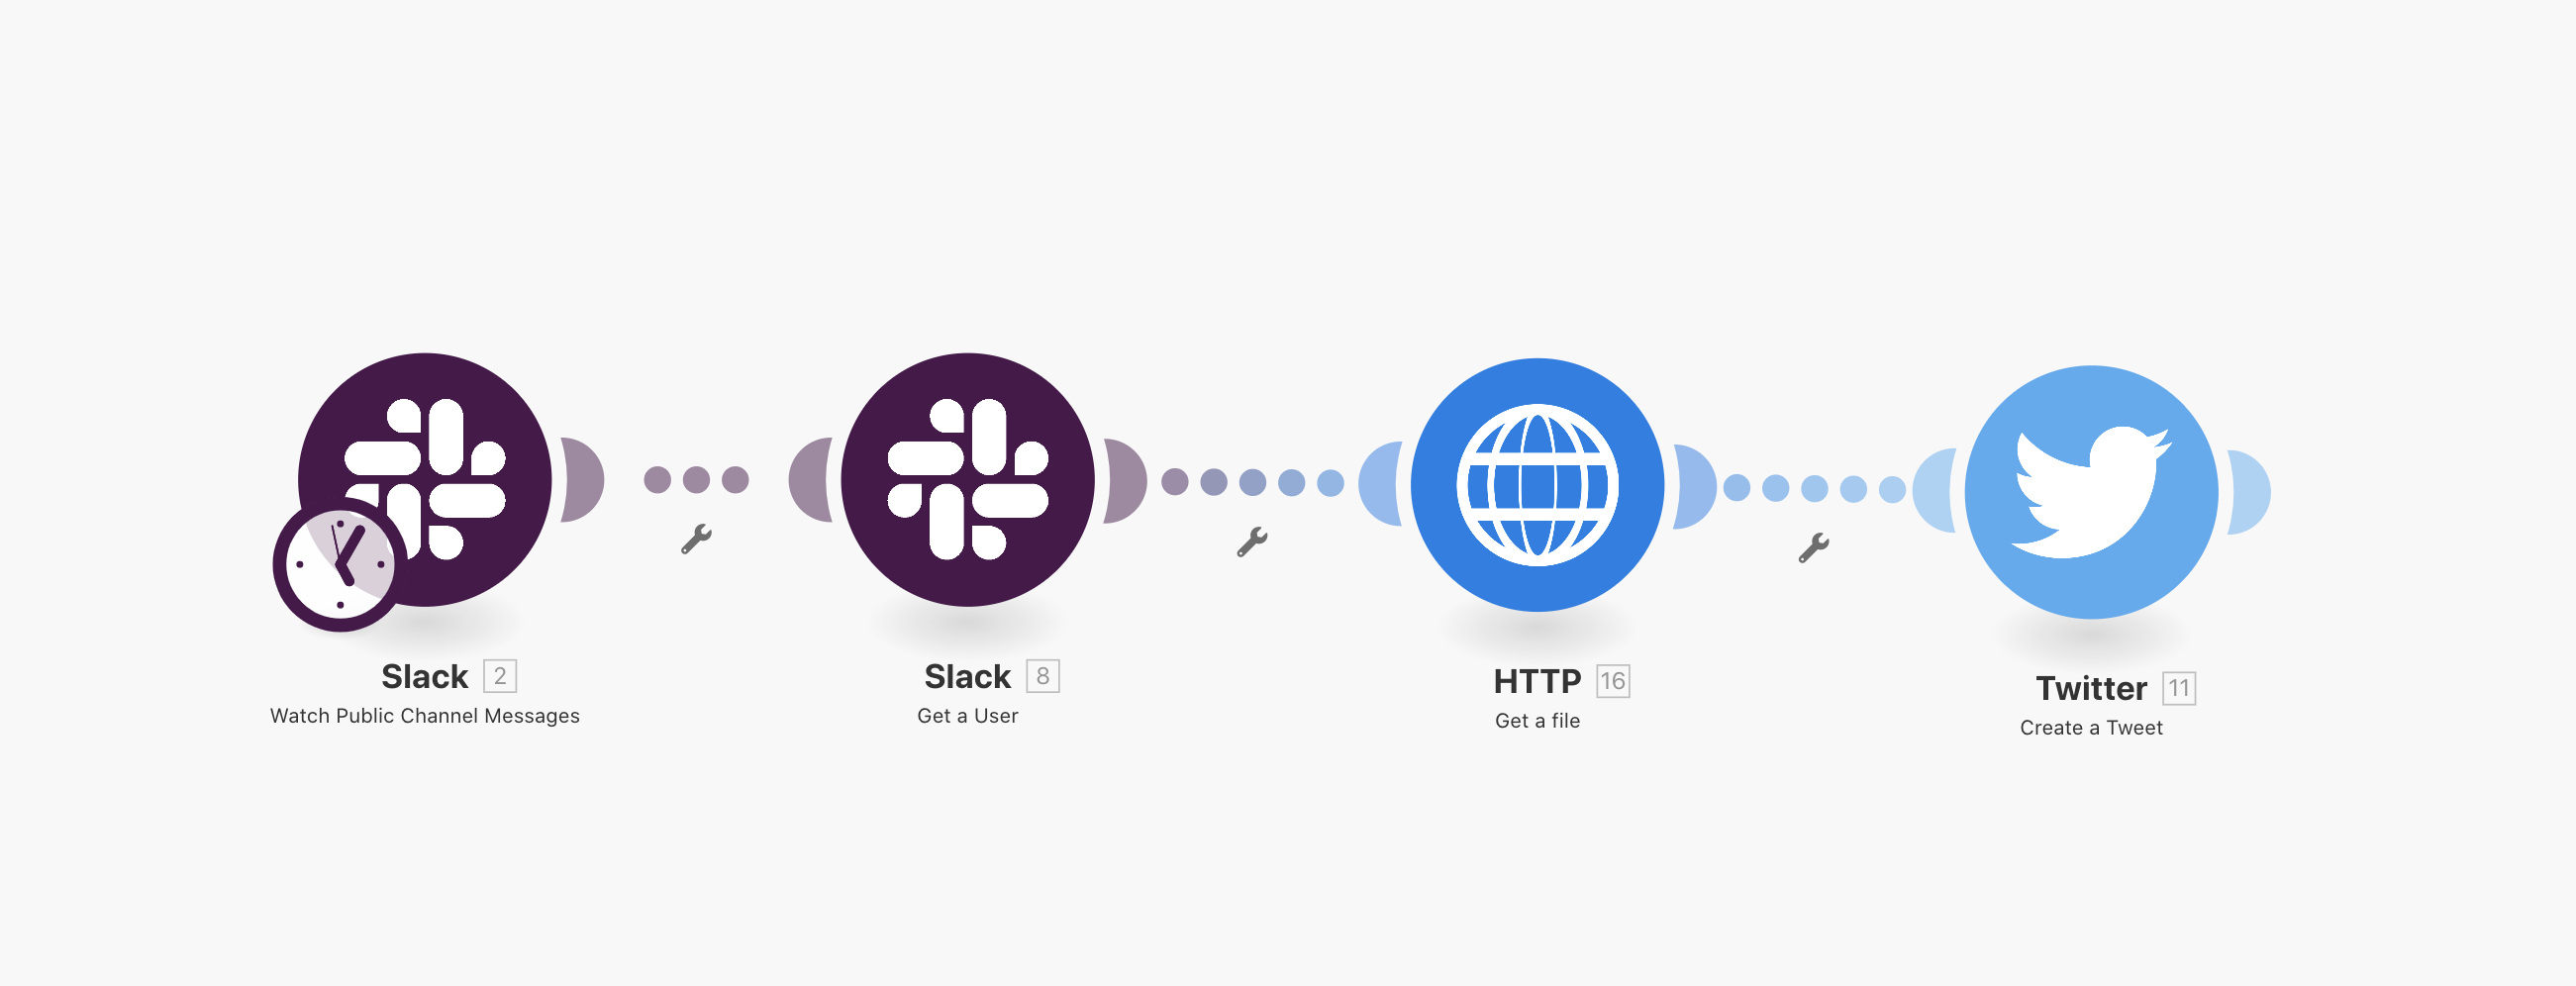
- Using the search bar, type "Slack" and select it when you find it.
- Erase the search bar, type "Twitter" and select it.
Up to this point you should be able to see both, Slack and Twitter already selected, like this:
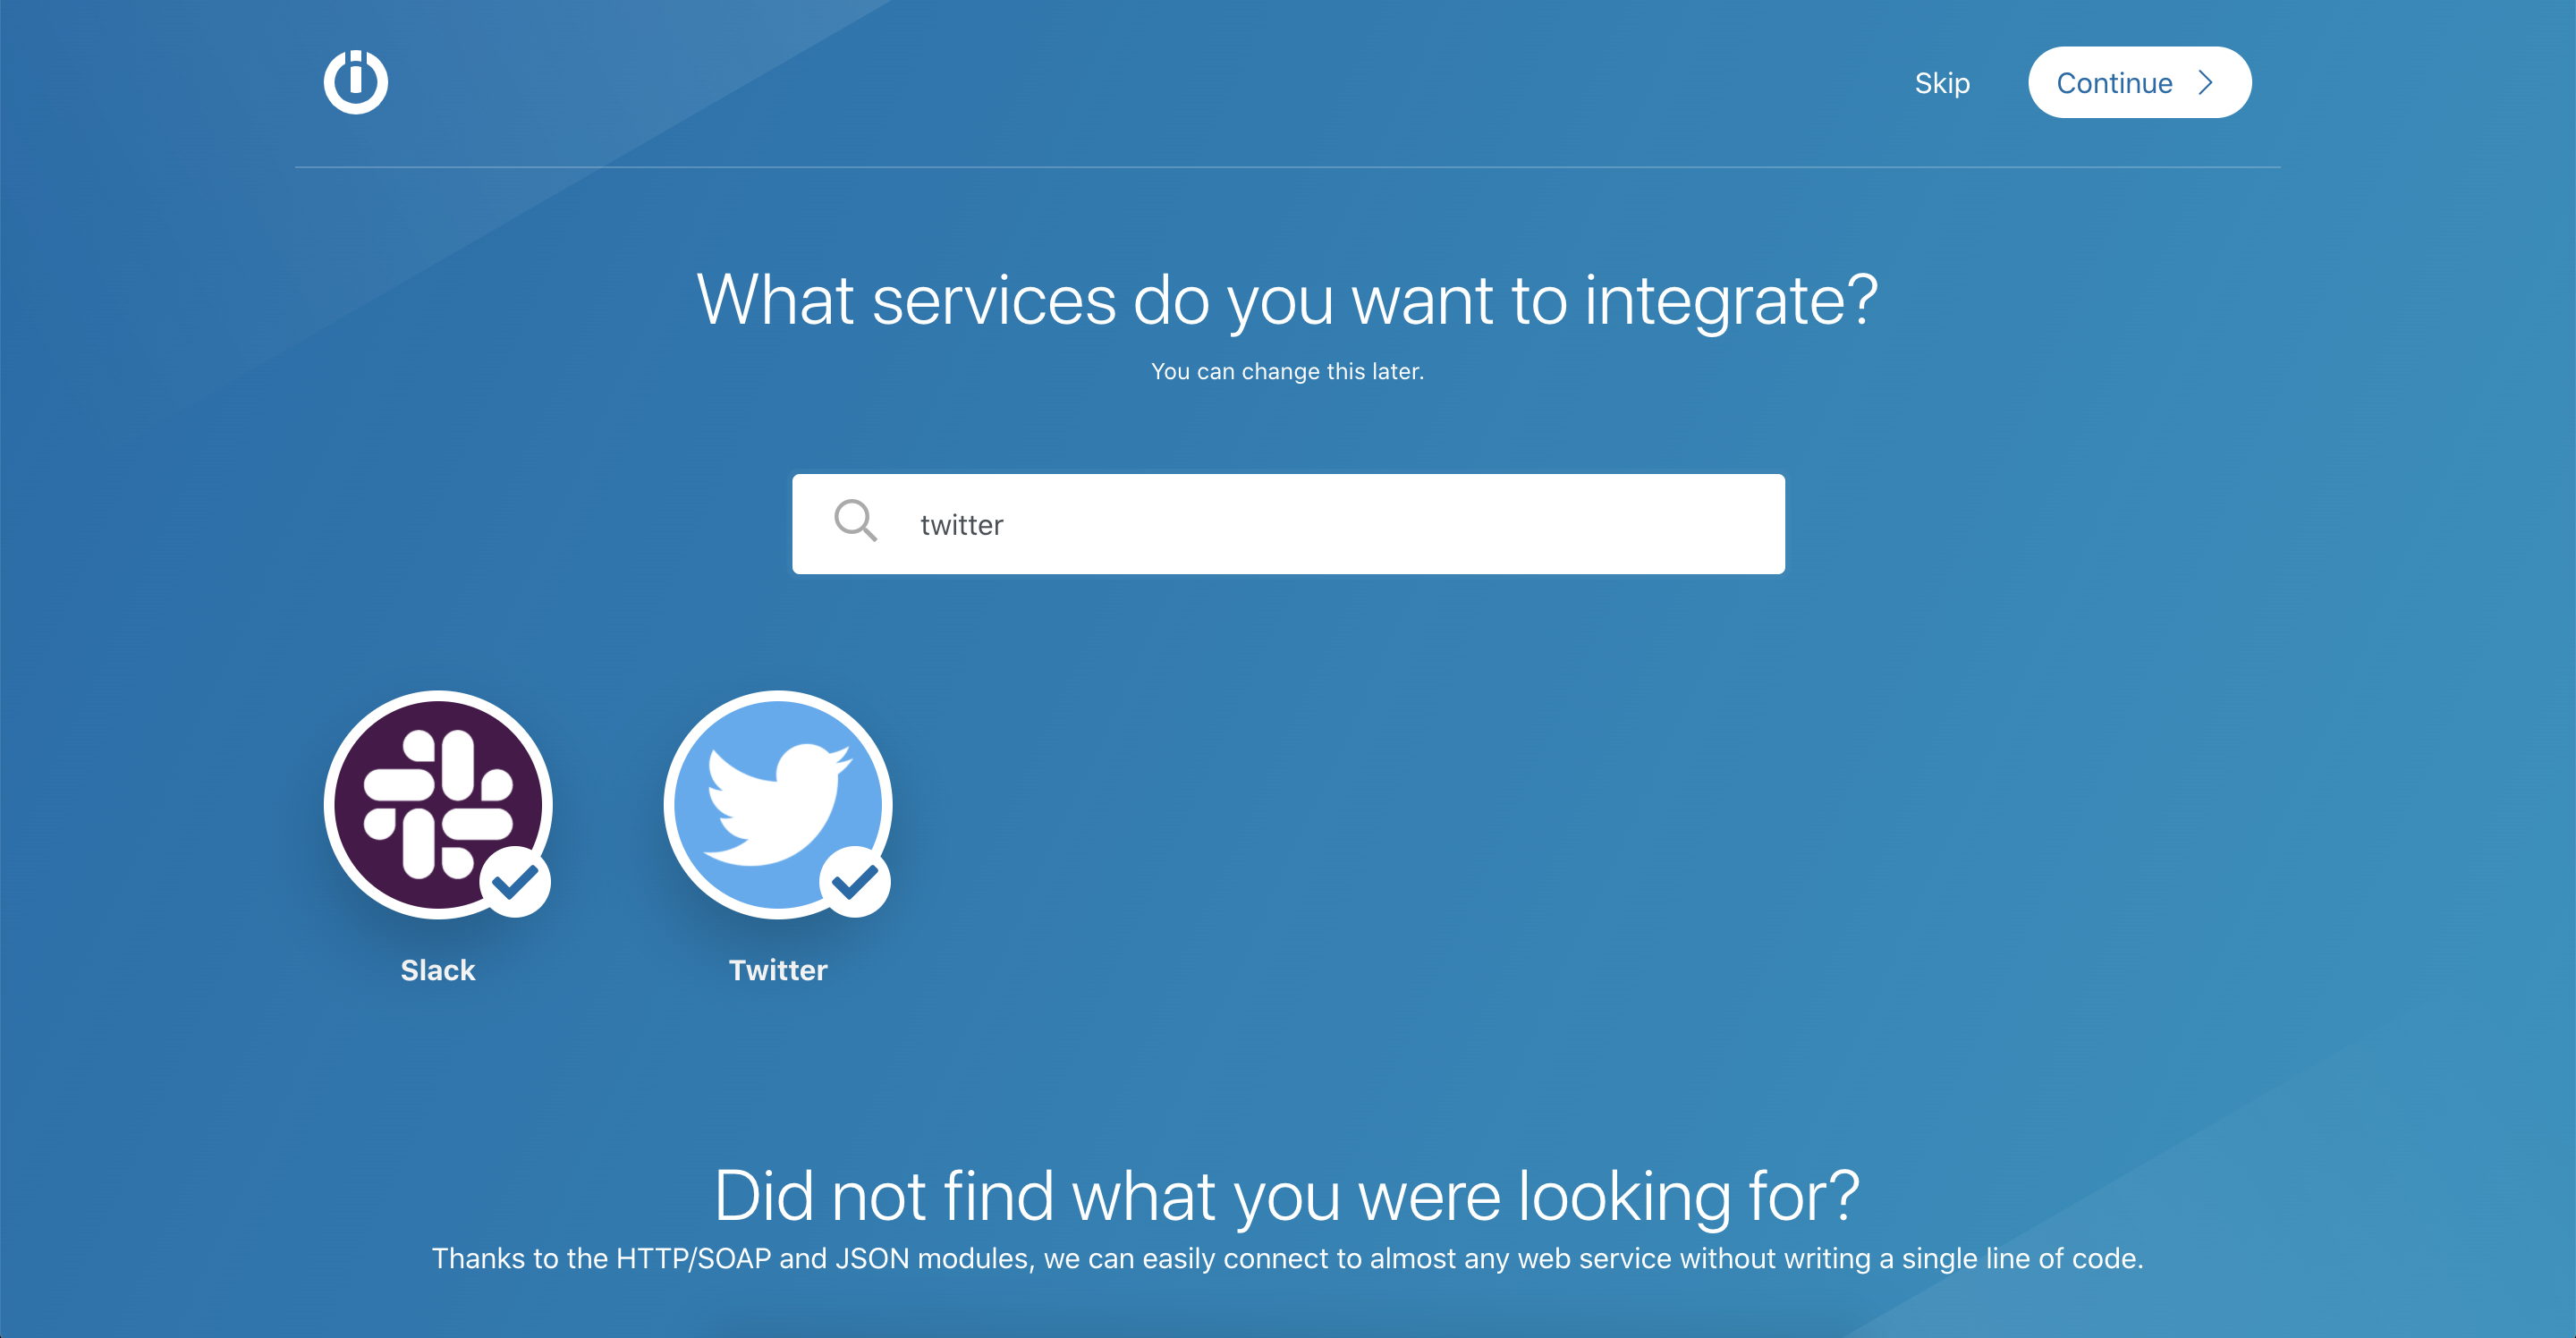
Finish this step by clicking Continue.
Step 02 – Slack configuration
In the scenario builder, click on the question symbol to add your first module and select Slack. Then you will see many options that can be automated. For this project, we will use View messages from public channels. Click on that option when you find it.
If the Slack channel you created to share references is private (has a lock), then select the "Watch Private Channel Messages" option.
Now you will see this box asking for a connection. Click on the add button.

You will see a box to type the name of the connection. This is just an alias that Integromat will use to remind you what Slack account you used and / or for what. You can put any name that is useful for you. We will use "References Tutorial".
A Slack window will open requesting your authorization to connect to Integromat. Click Allow to continue and this window will automatically close.
Now, two new fields have appeared in the Slack connection box. Channel and Limit. In Channel select the Slack channel where the references will be sent. In limit put the maximum number of references you want to be added every time Integromat works. For this example, we are going to place 5. (You can change this to your needs).
Click OK and then From now on
Step 03 – Twitter configuration
It is time to integrate our second application. To do this, click on the Twitter icon at the bottom and select Create a Tweet.
Then, we will add our connection between Twitter and Integromat. The process is the same as we did with Slack.
When the connection is done, the application will ask you to specify the Status (tweet) you want to automatically publish each time the integration runs:
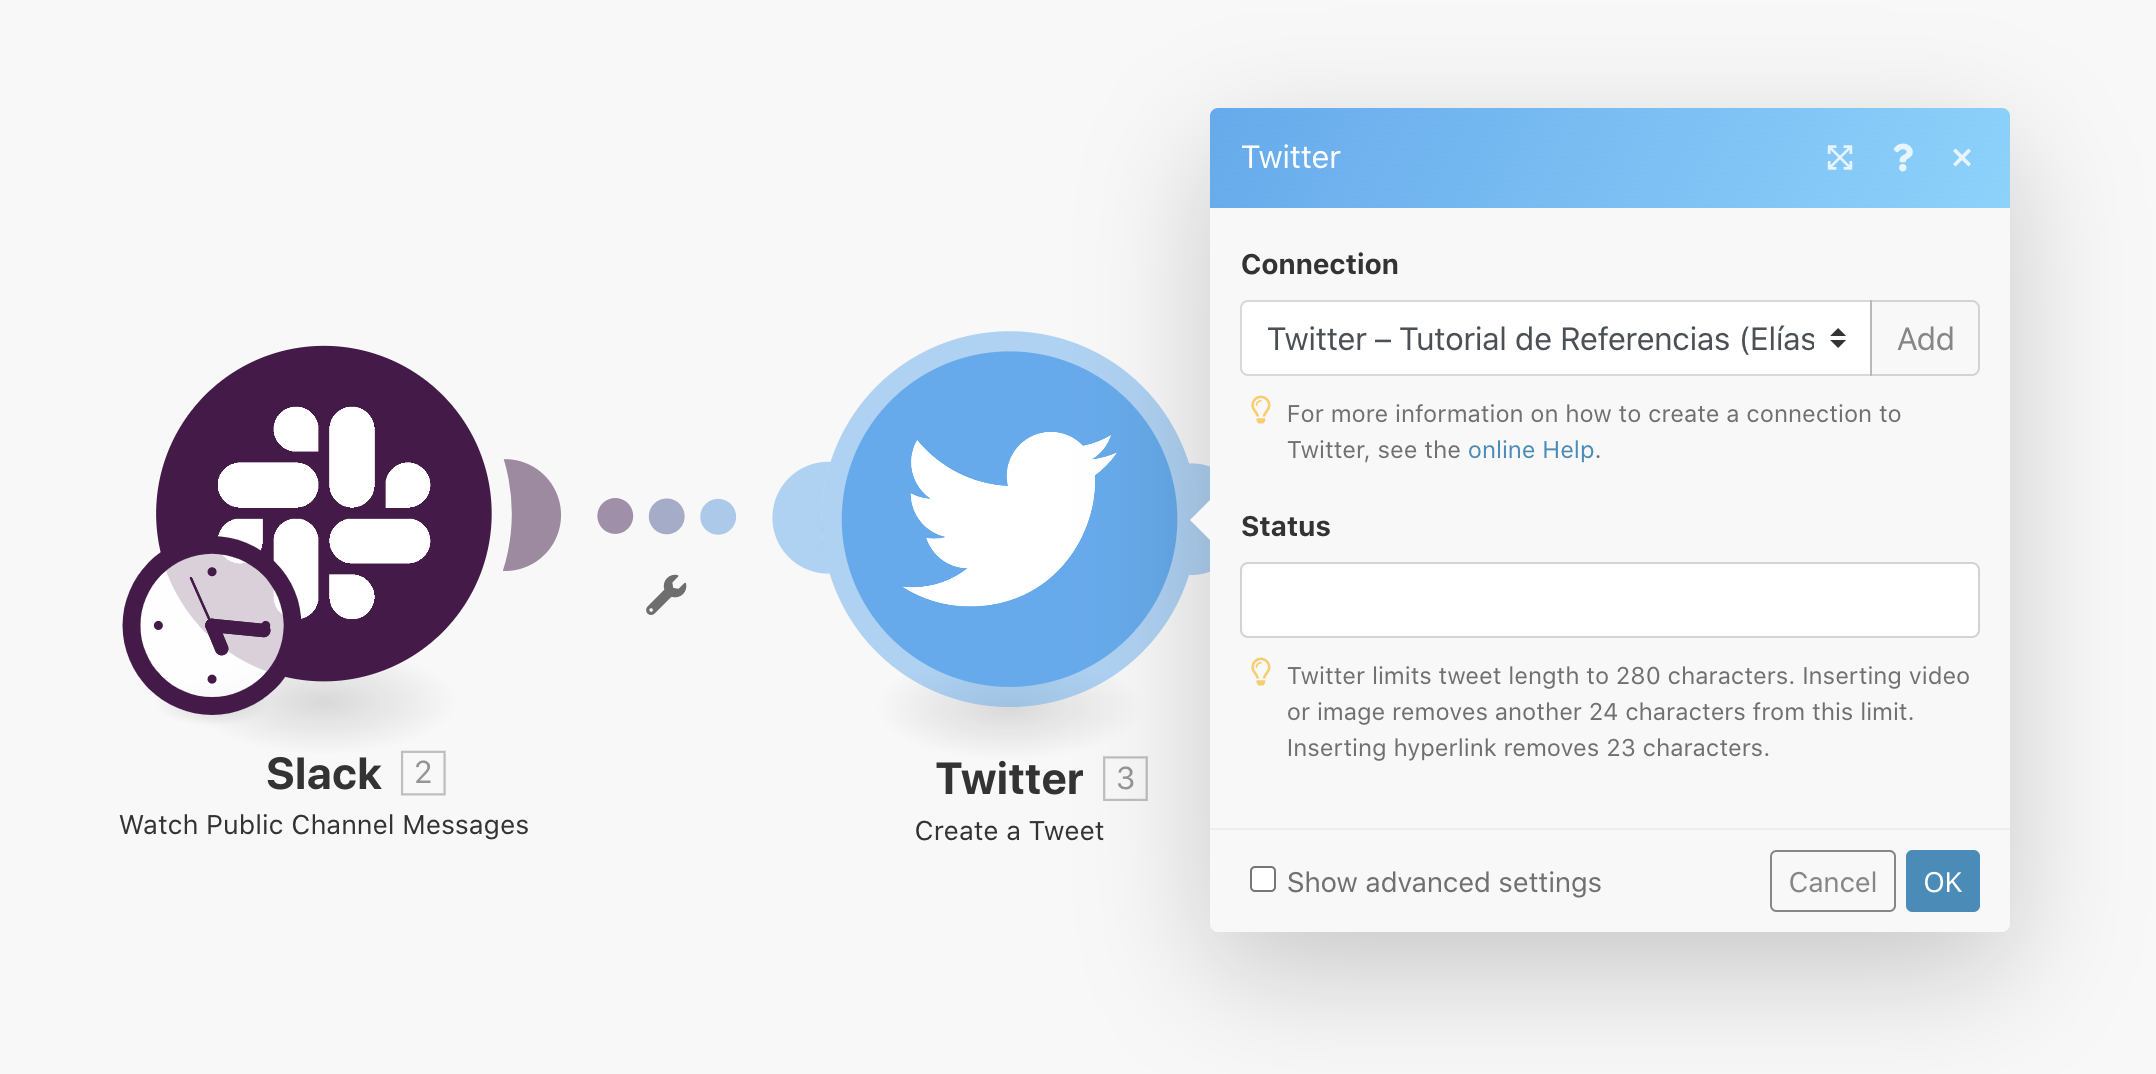
We don't have all the elements yet, so temporarily we put Twitter aside. Click on "Cancel" to close the Twitter configuration box. Don't worry, the connection is already saved. We will come back a few steps later.
Step 04 – Getting the author
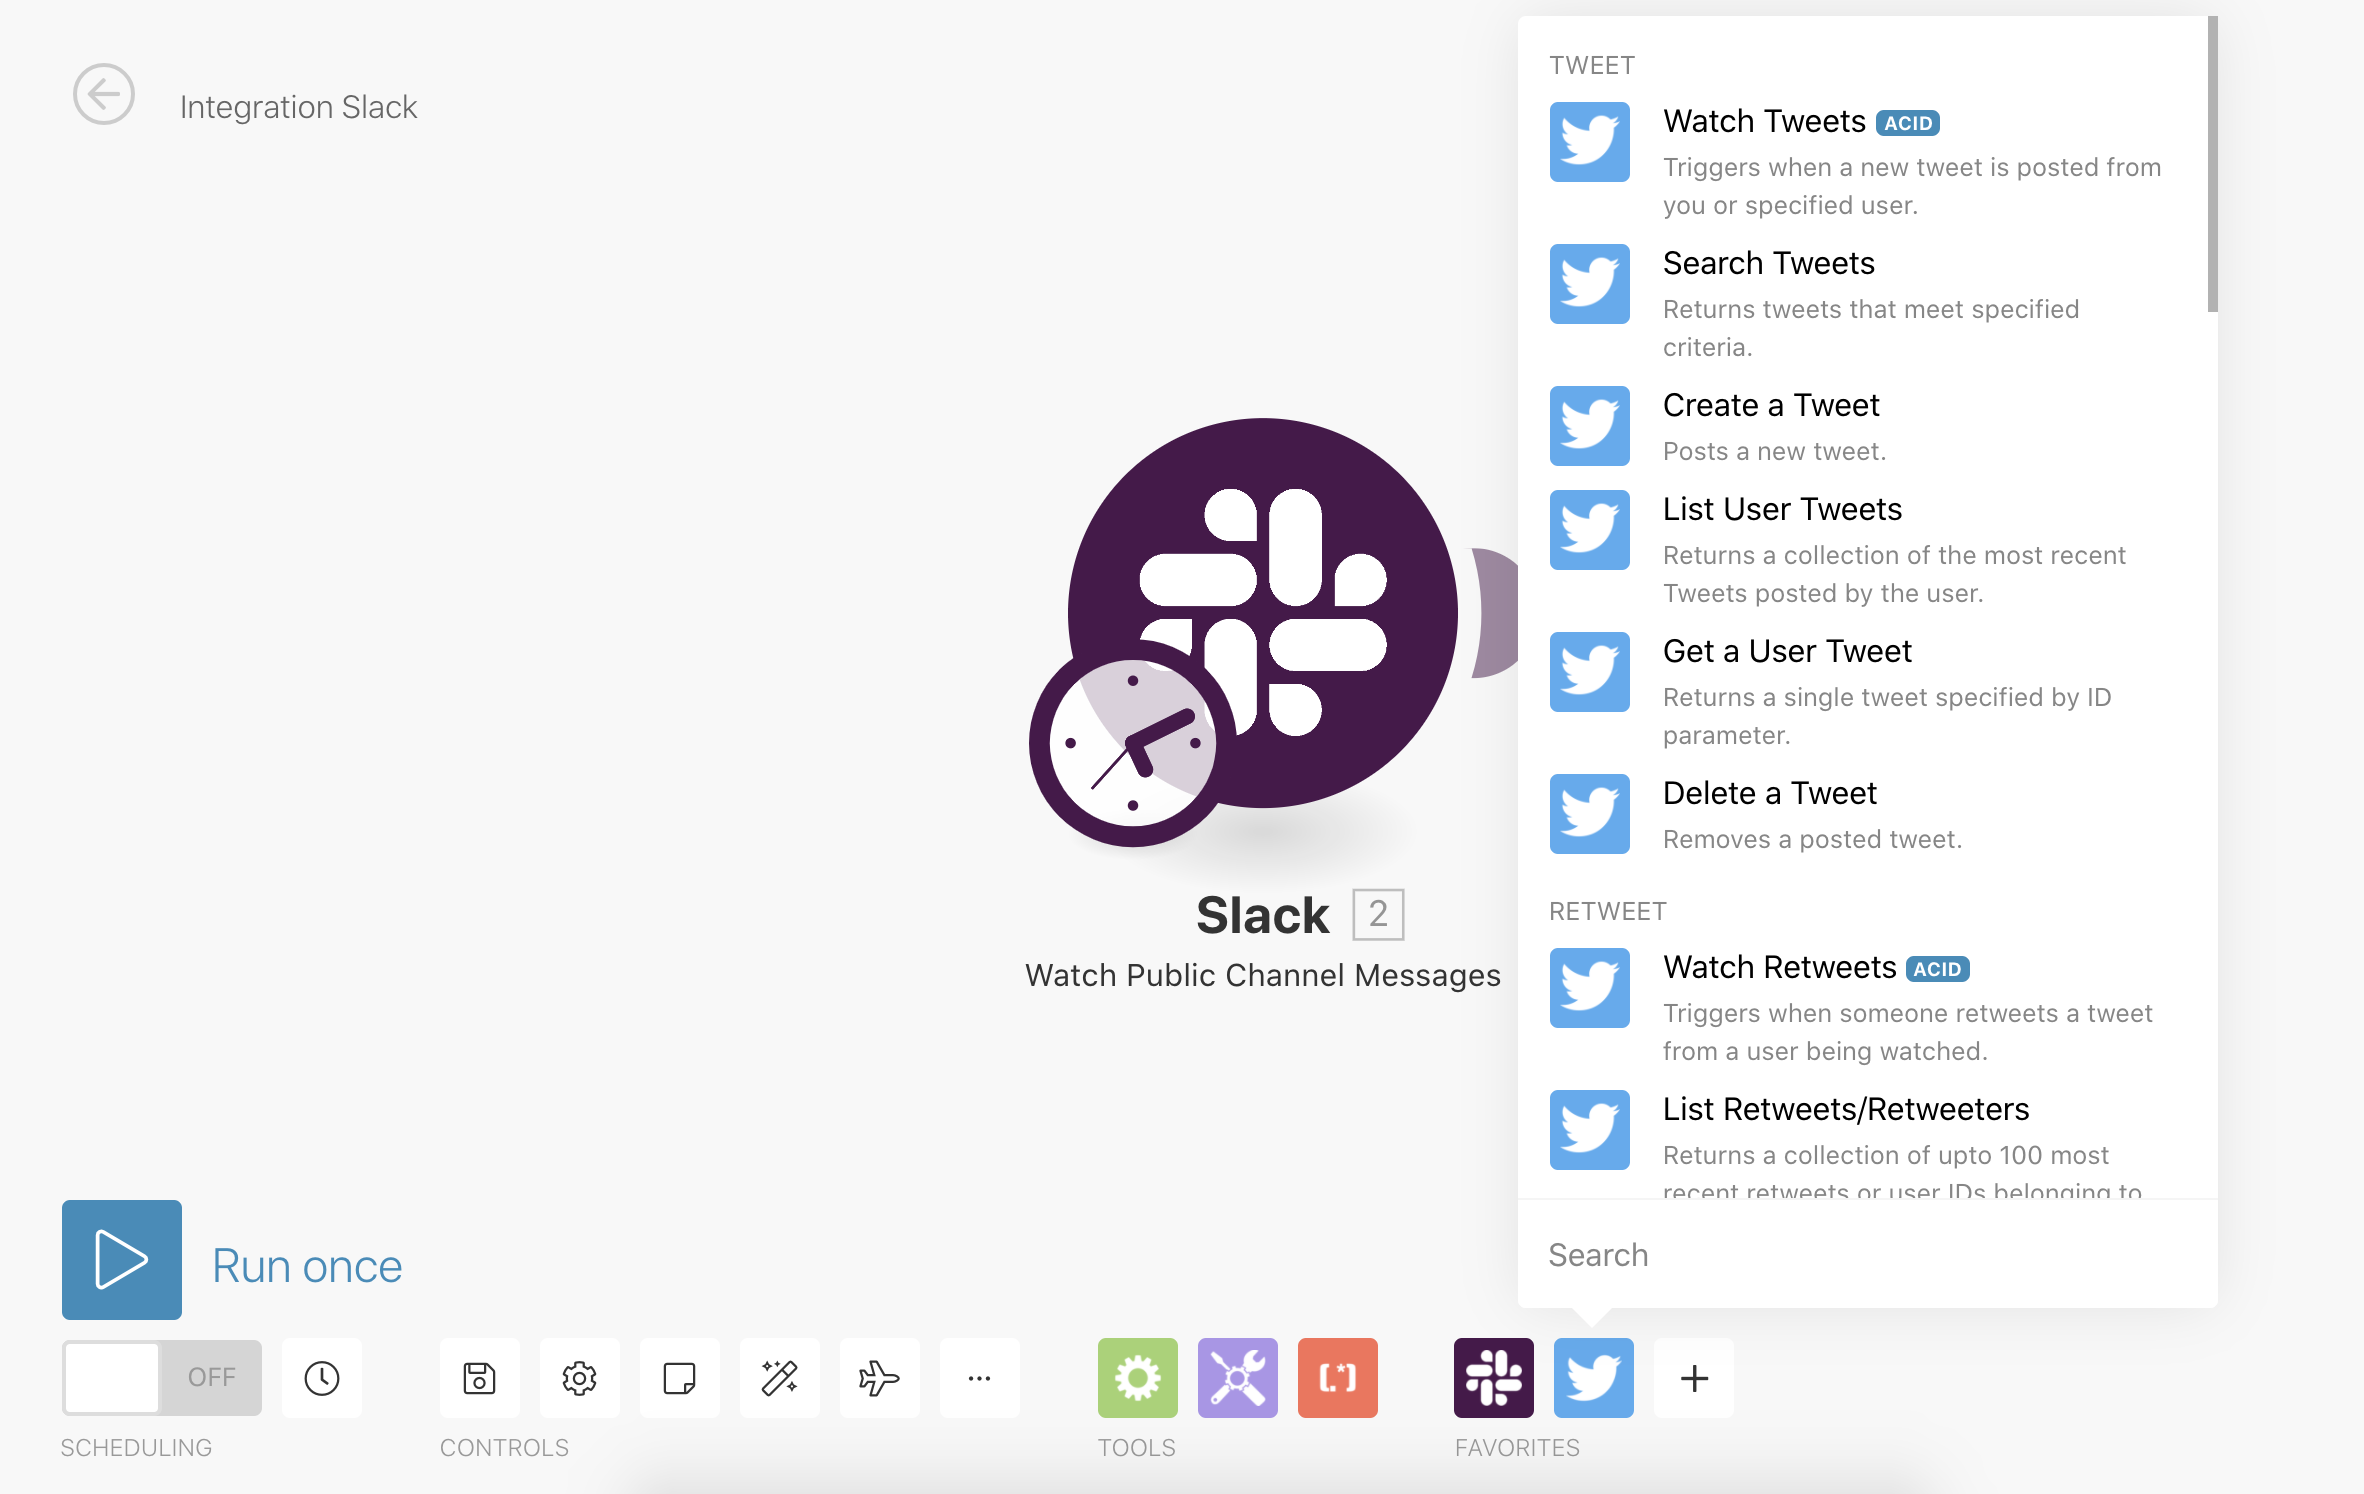
So far, the Slack module we already have in our integration, can only indicate the message that was sent in the Slack channel, but not the author. For our Tweet, we would like to include the author name as well. So we must add another Slack module. The one we are looking for is called "Get a user". This module can be placed between the Slack one that we already have and Twitter.
When adding a module, you can use the search to quickly filter the action or trigger you want.
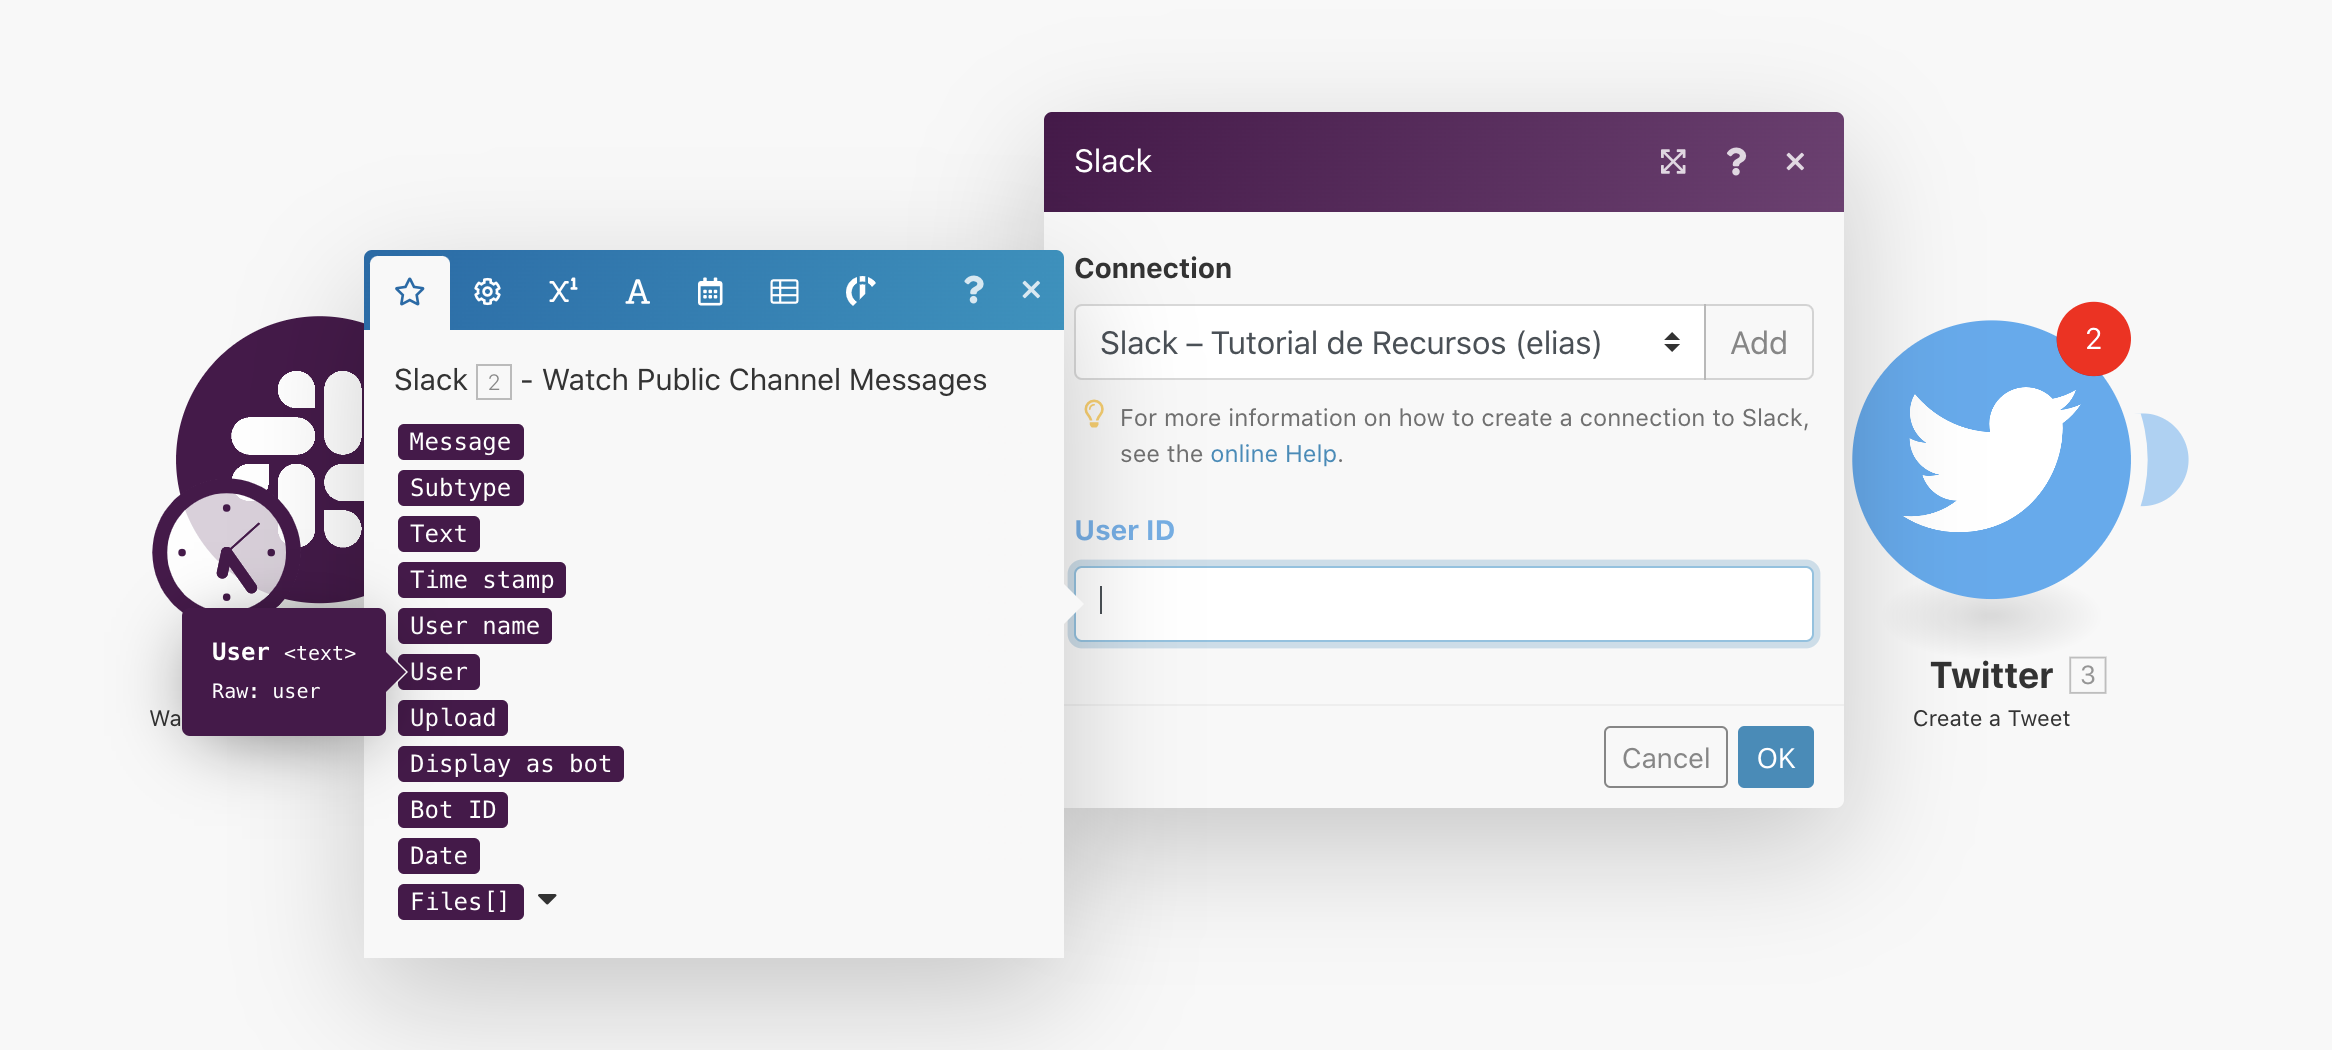
The only available option is to type the ID of the user who sent the message. Select the "User" option that the first Slack module gives us.
Step 05 – Adding an image
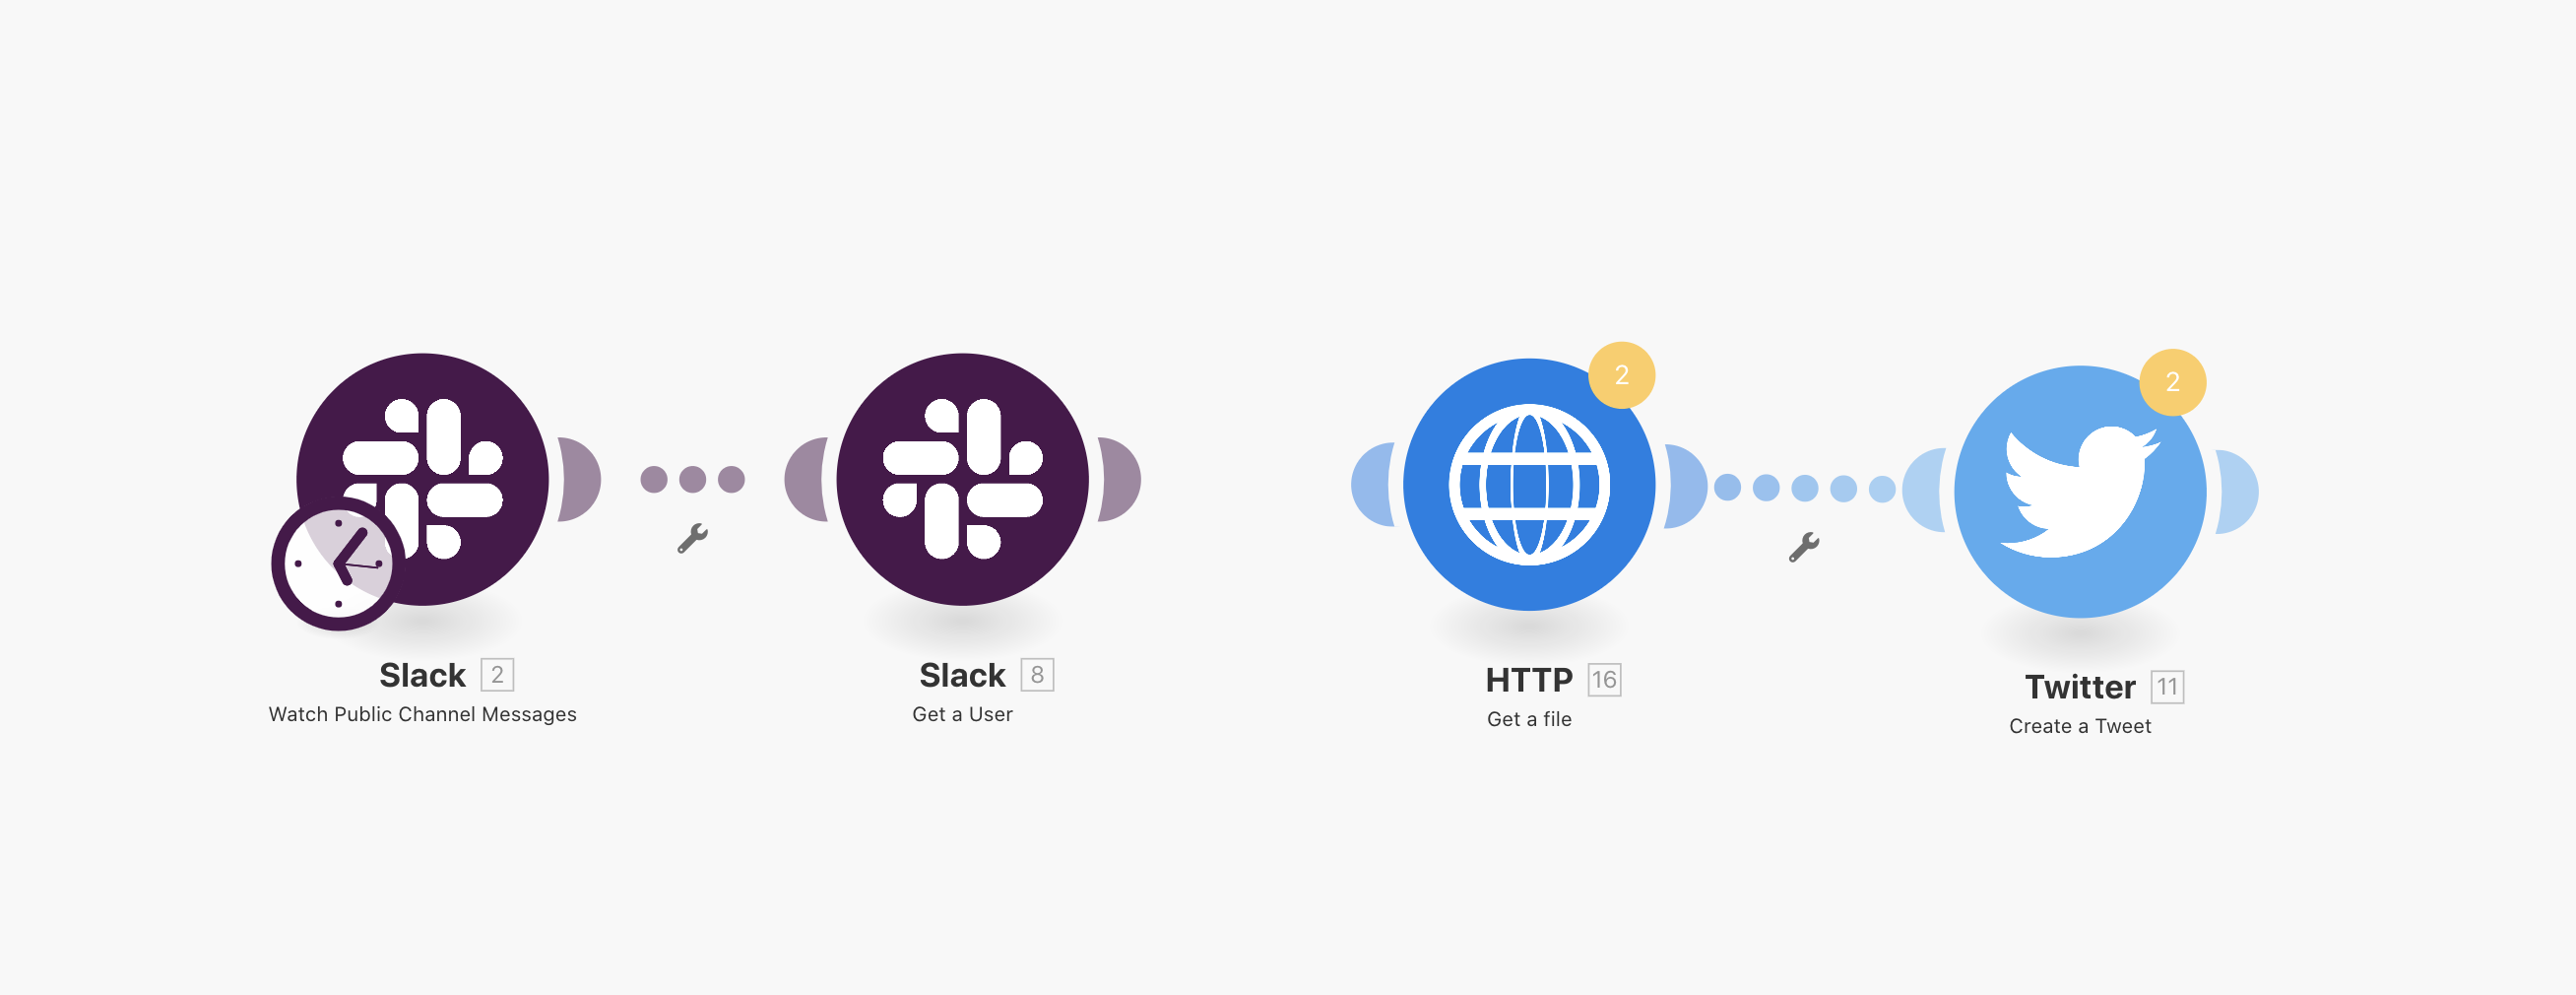
For our automated tweet, we are going to use the same image you see on Slack. To do so, we need an HTTP module and the action is Get a file. Place it before Twitter. Your flow should look like this:
To link the slack image to this module is necessary to run a test. This will allow Integromat to see what kind of information it is going to automate and it will generate more variables we can use for this and our twitter module.
To run a test, send a link in the references Slack channel. Example: https://minimum.run/
Then go to Integromat and unlink HTTP from our flow. This is needed since this module and the Twitter module aren't ready yet. To do so, right-click the dots connecting HTTP with Slack and click "unlink". You should have something like this:
Now click Run once.
When the process is done, if everything is ok, there should be a number 1 above each module except for HTTP and Twitter. This number tell us how many messages have been processed correctly.
Connect Slack with HTTP. Click on HTTP to open the configuration box and select image_url from attachments. Like this:

Step 06 – Creating the tweet
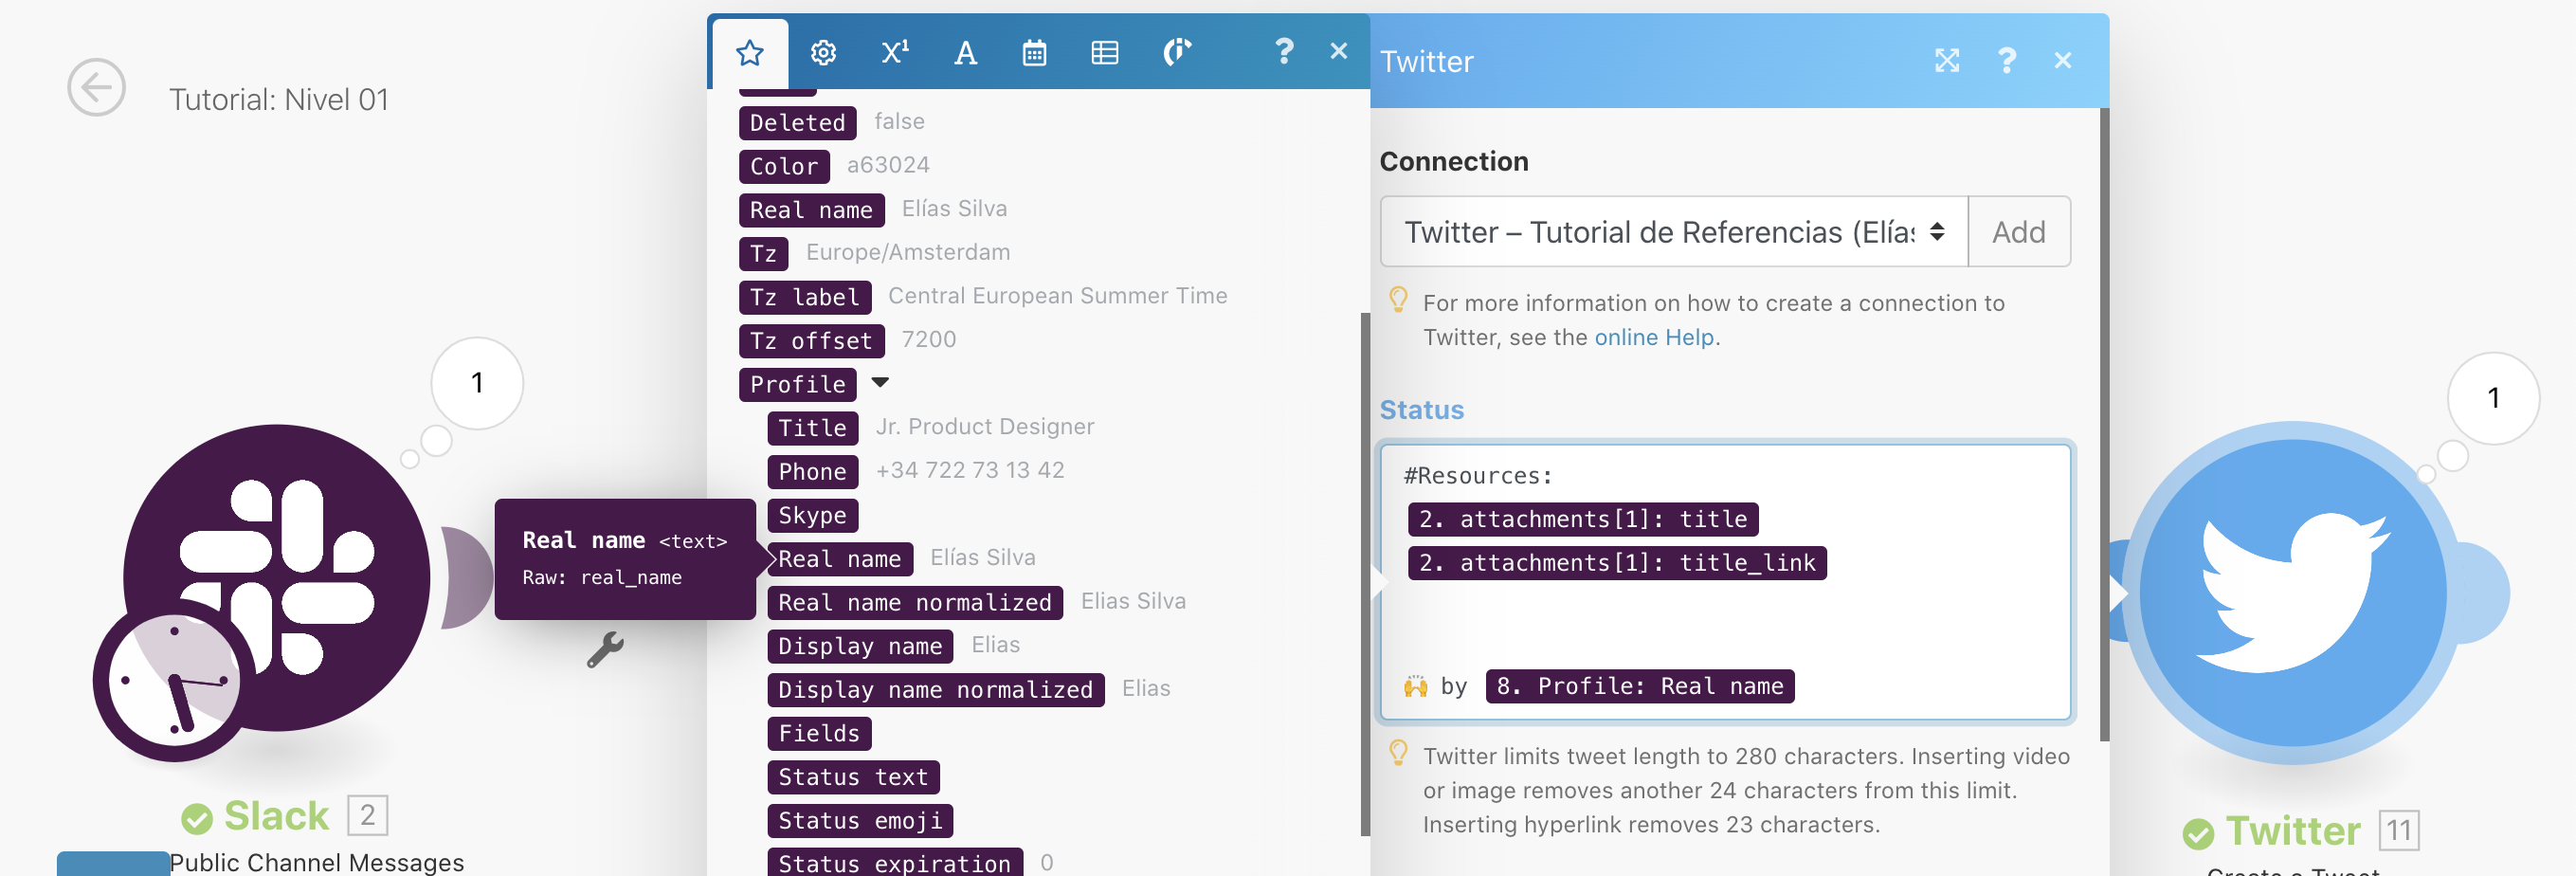
Back on Twitter, we now have all the elements we need to create our tweet. This is an example tweet we would like to be automatically posted. You can copy this to follow along.
#Resources:
Minimum.run
https://minimum.run
🙌 by Elías Silva
We must change the webpage title, the link and the author so that they correspond to the message that was sent in Slack. We will use the variables that Integromat has and the results of the test carried out.
Both, the webpage title and the link are variables from our main Slack module. They can be found under attachments, called title and title_link.

For the author, we will use the variable Real name, generated by the second Slack module Get a user.
Lastly, we should include the image as an attachment. To do so, click Show advaced settings and add an item under Attachments.
- Source file: HTTP - Get a file
- Media category: Tweet image
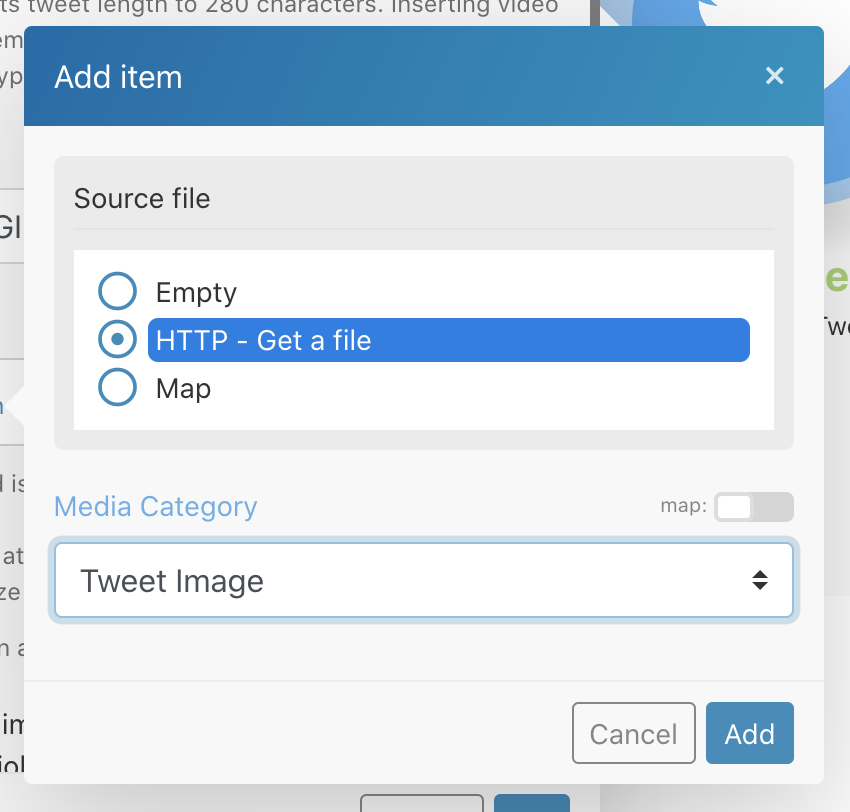
Now click Add and then OK to save the module configuration.
Step 07 – Finishing
If you've followed this tutorial up to this point, you should be ready to run your automated system. Before doing so, we will do one last manual test to make sure everything is ok.
Just like the previous time, to start the test, you need to send a link on the Slack channel. Then click Run Once.
Now, save and activate your integration!
Next steps
Right now, our integration works only if a full link (like: https://minimum.run) is sent in the Slack channel. But, what happens if someone adds an image or sends a text message? Don't worry, we are about to release the second part of this tutorial in which we will address this problem and will add a Webflow site to automatically display our references using their built-in database.
Here is a sneak peak of the template we will be using. Take a look, clone it, give it a like, and let us know what you think of it: https://webflow.com/minimumrun
Next parts:
- Part 2 – Adding a link filter and publishing to Webflow.
- Part 3 – Adding a database to avoid duplicates and using better images.
- Part 4 – What would you like to build? Tweet us @minimumrun
Let’s grow together
Reach a new level of growth